
16. Trade Management: Break-Even, Partials and Trailing Stops
Trade management explained: when break-even stops cost you money, partial exits, four kinds of trailing stop, the order-flow exit, and diagnosing yourself with MFE and MAE.

16. Trade Management: Break-Even, Partials and Trailing Stops
You did everything right. Correct level, real absorption, clean trigger, proper size. You are in the trade and it is working. Now what?
This is the part that gets the least attention and does the most damage. Two traders can take the exact same entry — same candle, same size — and one makes three times what the other makes, or one loses and the other does not. The entry was identical. Everything after it was not.
Same entry. Different management. Completely different outcome.
And here is the thing nobody says: most traders manage too much. Over-management is a bigger problem than under-management, and it feels responsible the entire time it is destroying your expectancy.
This is the last lesson of the course. Open the paper-trading blotter — every technique here has a one-click version in it, and the performance hub measures whether you are over-managing.
What you'll learn in this lesson
- The core trade-off every management technique makes, and where it flips against you
- Why break-even stops get hit disproportionately often — and the four times they are correct
- Partial exits: the honest cost, and why you should still take them while learning
- Four kinds of trailing stop, ranked
- Fixed-R targets vs level targets, and time stops
- Adding to winners, reversing, and the one thing you must never do
- The order-flow exit — the technique this whole course was built to enable
- How to diagnose your own over-management with MFE and MAE
Lesson 16 of 16 · Part 3 — Trading. The final lesson of the free order flow trading course. Previous: How to Day Trade Crypto With Order Flow.
▶ Prefer to watch it?
Position actions and the MFE/MAE metrics: Free Crypto Paper Trading on the Live Market (Ep 10) · What the order flow tells you while you are still in the trade: 5 Things Order Flow Shows That Indicators Never Will
The core tension
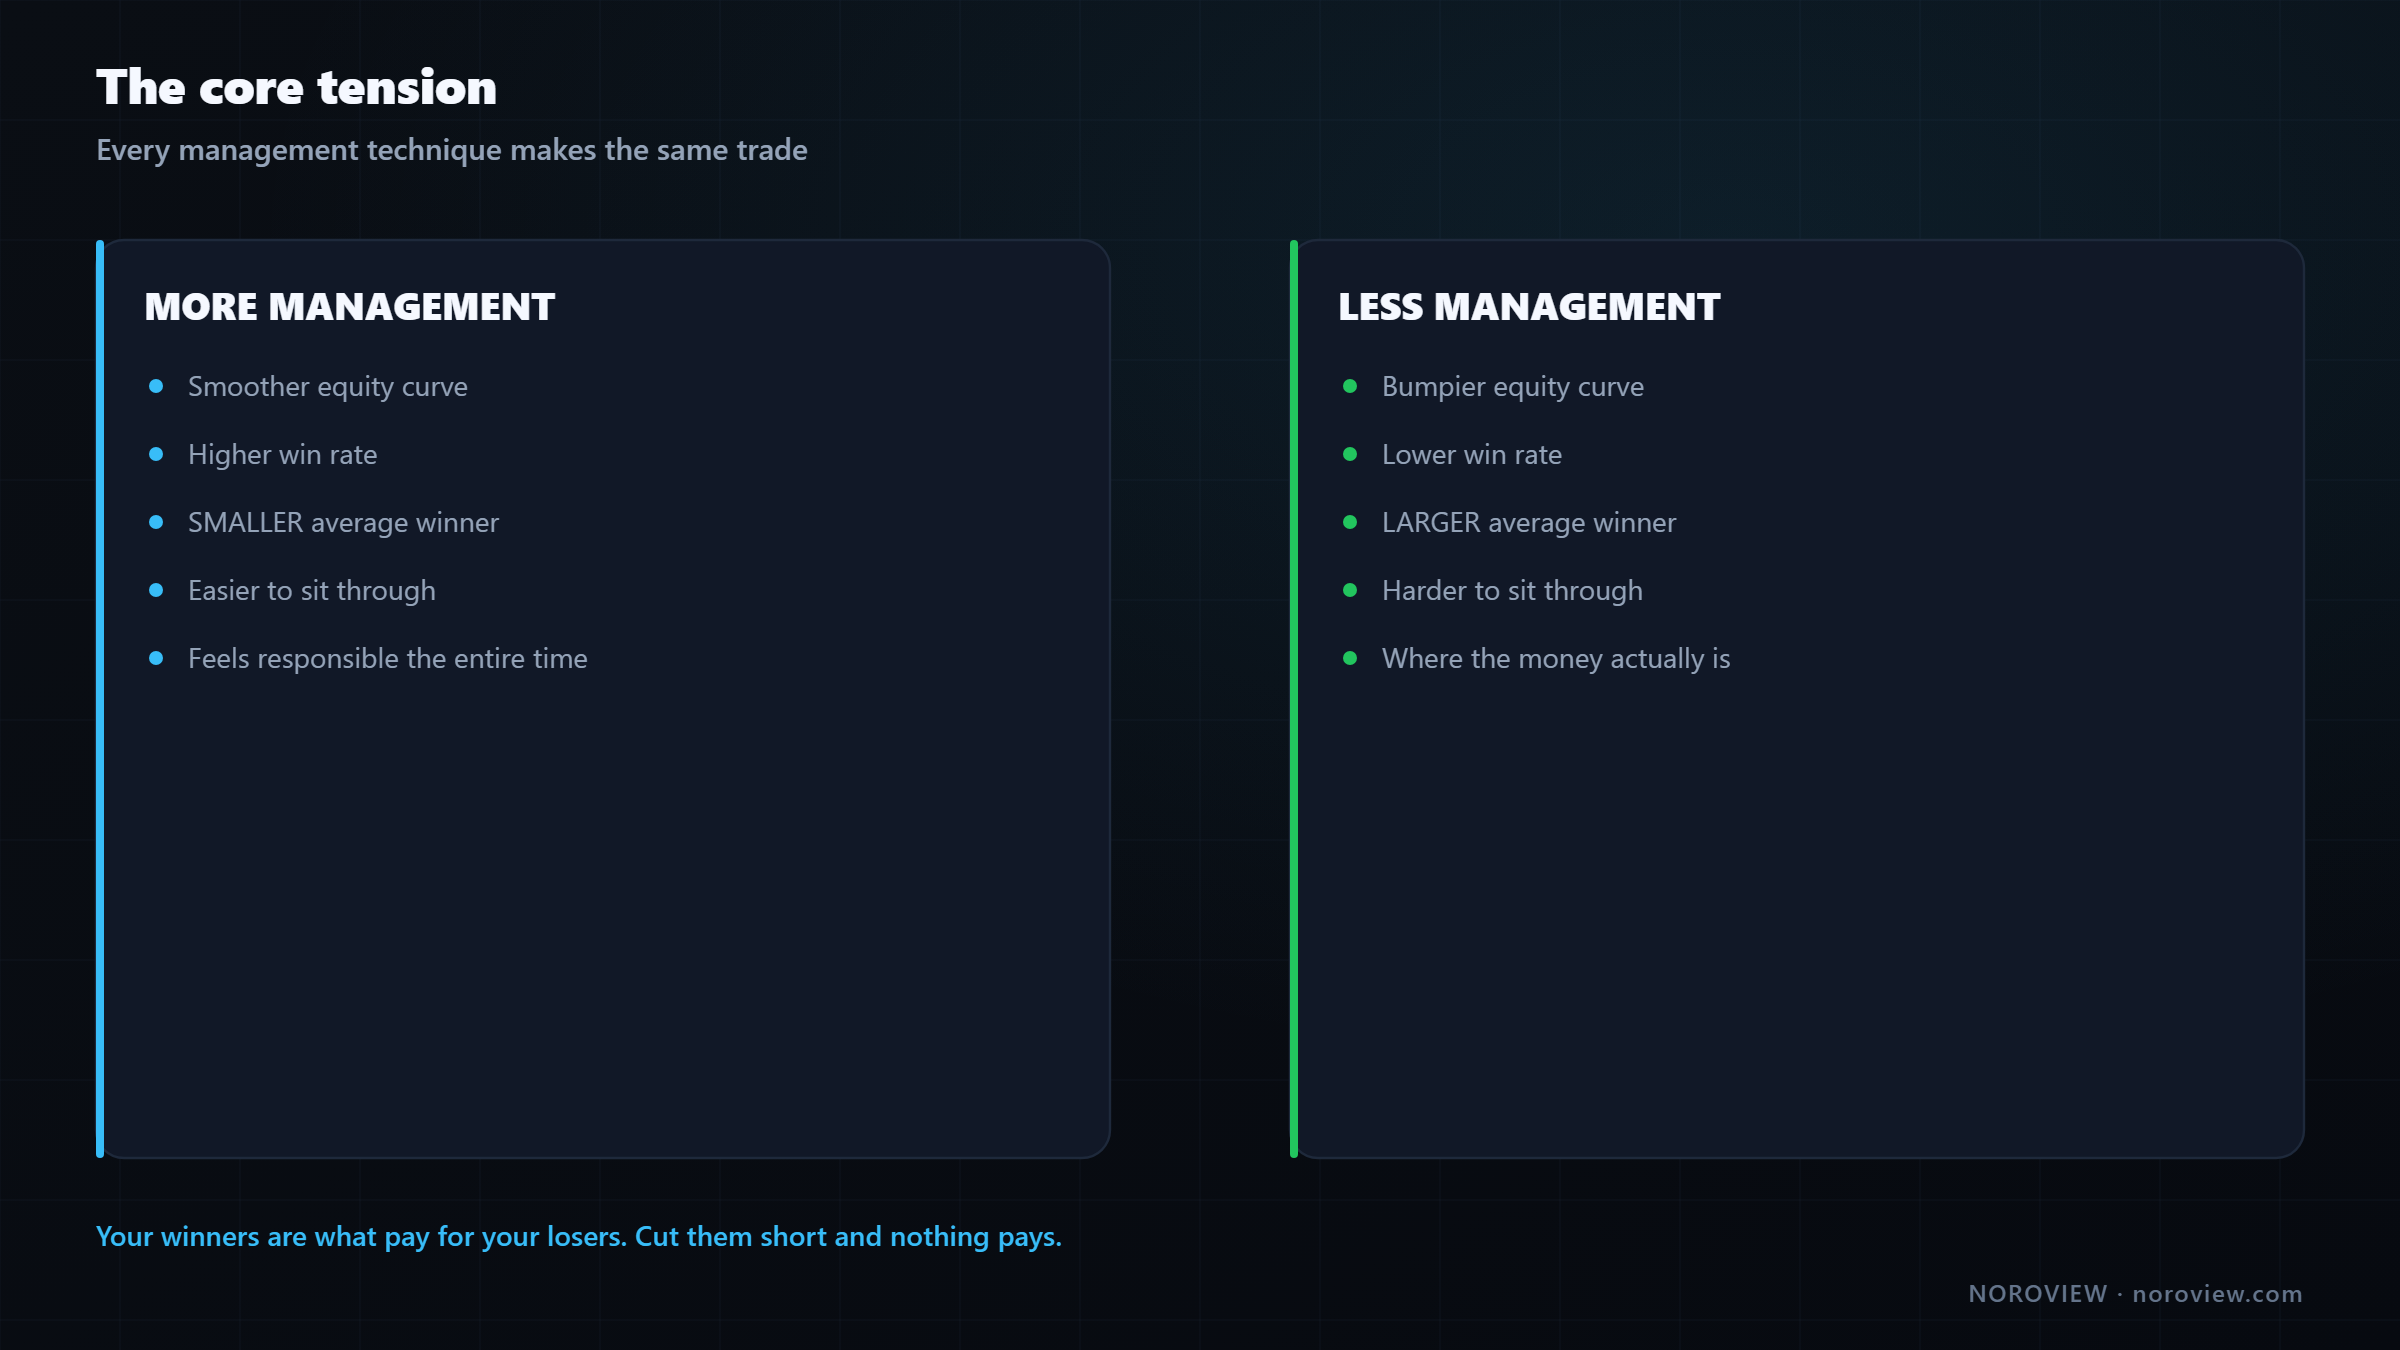
| More management | Less management |
|---|---|
| Smoother equity curve | Bumpier equity curve |
| Higher win rate | Lower win rate |
| Smaller average winner | Larger average winner |
| Easier to sit through | Harder to sit through |
Every management technique does the same two things: it reduces variance and it reduces your average winner. That is the trade, and it is unavoidable. There is no technique that protects your downside without touching your upside, and anybody selling you one is selling you something.
Reducing variance is genuinely valuable — lesson 5 established that a strategy you can actually follow beats a better one you will abandon. If management keeps you inside your rules, it has earned its cost.
But there is a point where it flips, and most retail traders are far past it. They move stops too early, take partials too soon, trail too tightly. Every one of those decisions feels prudent, which is what makes it so hard to see.
Here is the mechanism:
Your winners are what pay for your losers. Cut them short and nothing pays.
At a 55% win rate, 45% of your trades lose. The only thing that makes the arithmetic work is that your winners are bigger than your losers. That is the whole engine. So every time you cut a winner short to feel safe, you take money out of the one thing that pays for your losses. Do it enough and you get the classic outcome: a high win rate, a great-looking record, and an account that goes slightly down.
The most common way to ruin a good strategy is to protect it too carefully.
This is not a personal failing, incidentally. Odean's work on the disposition effect documented the same pattern across thousands of retail accounts: investors systematically realise gains too early and hold losses too long. Knowing that does not fix it. Rules do.
Going risk-free: the honest version
The most popular technique, and the most misused. You move your stop to your entry, price comes back, you exit flat. You cannot lose on this trade. It feels like free protection.
It is not free.
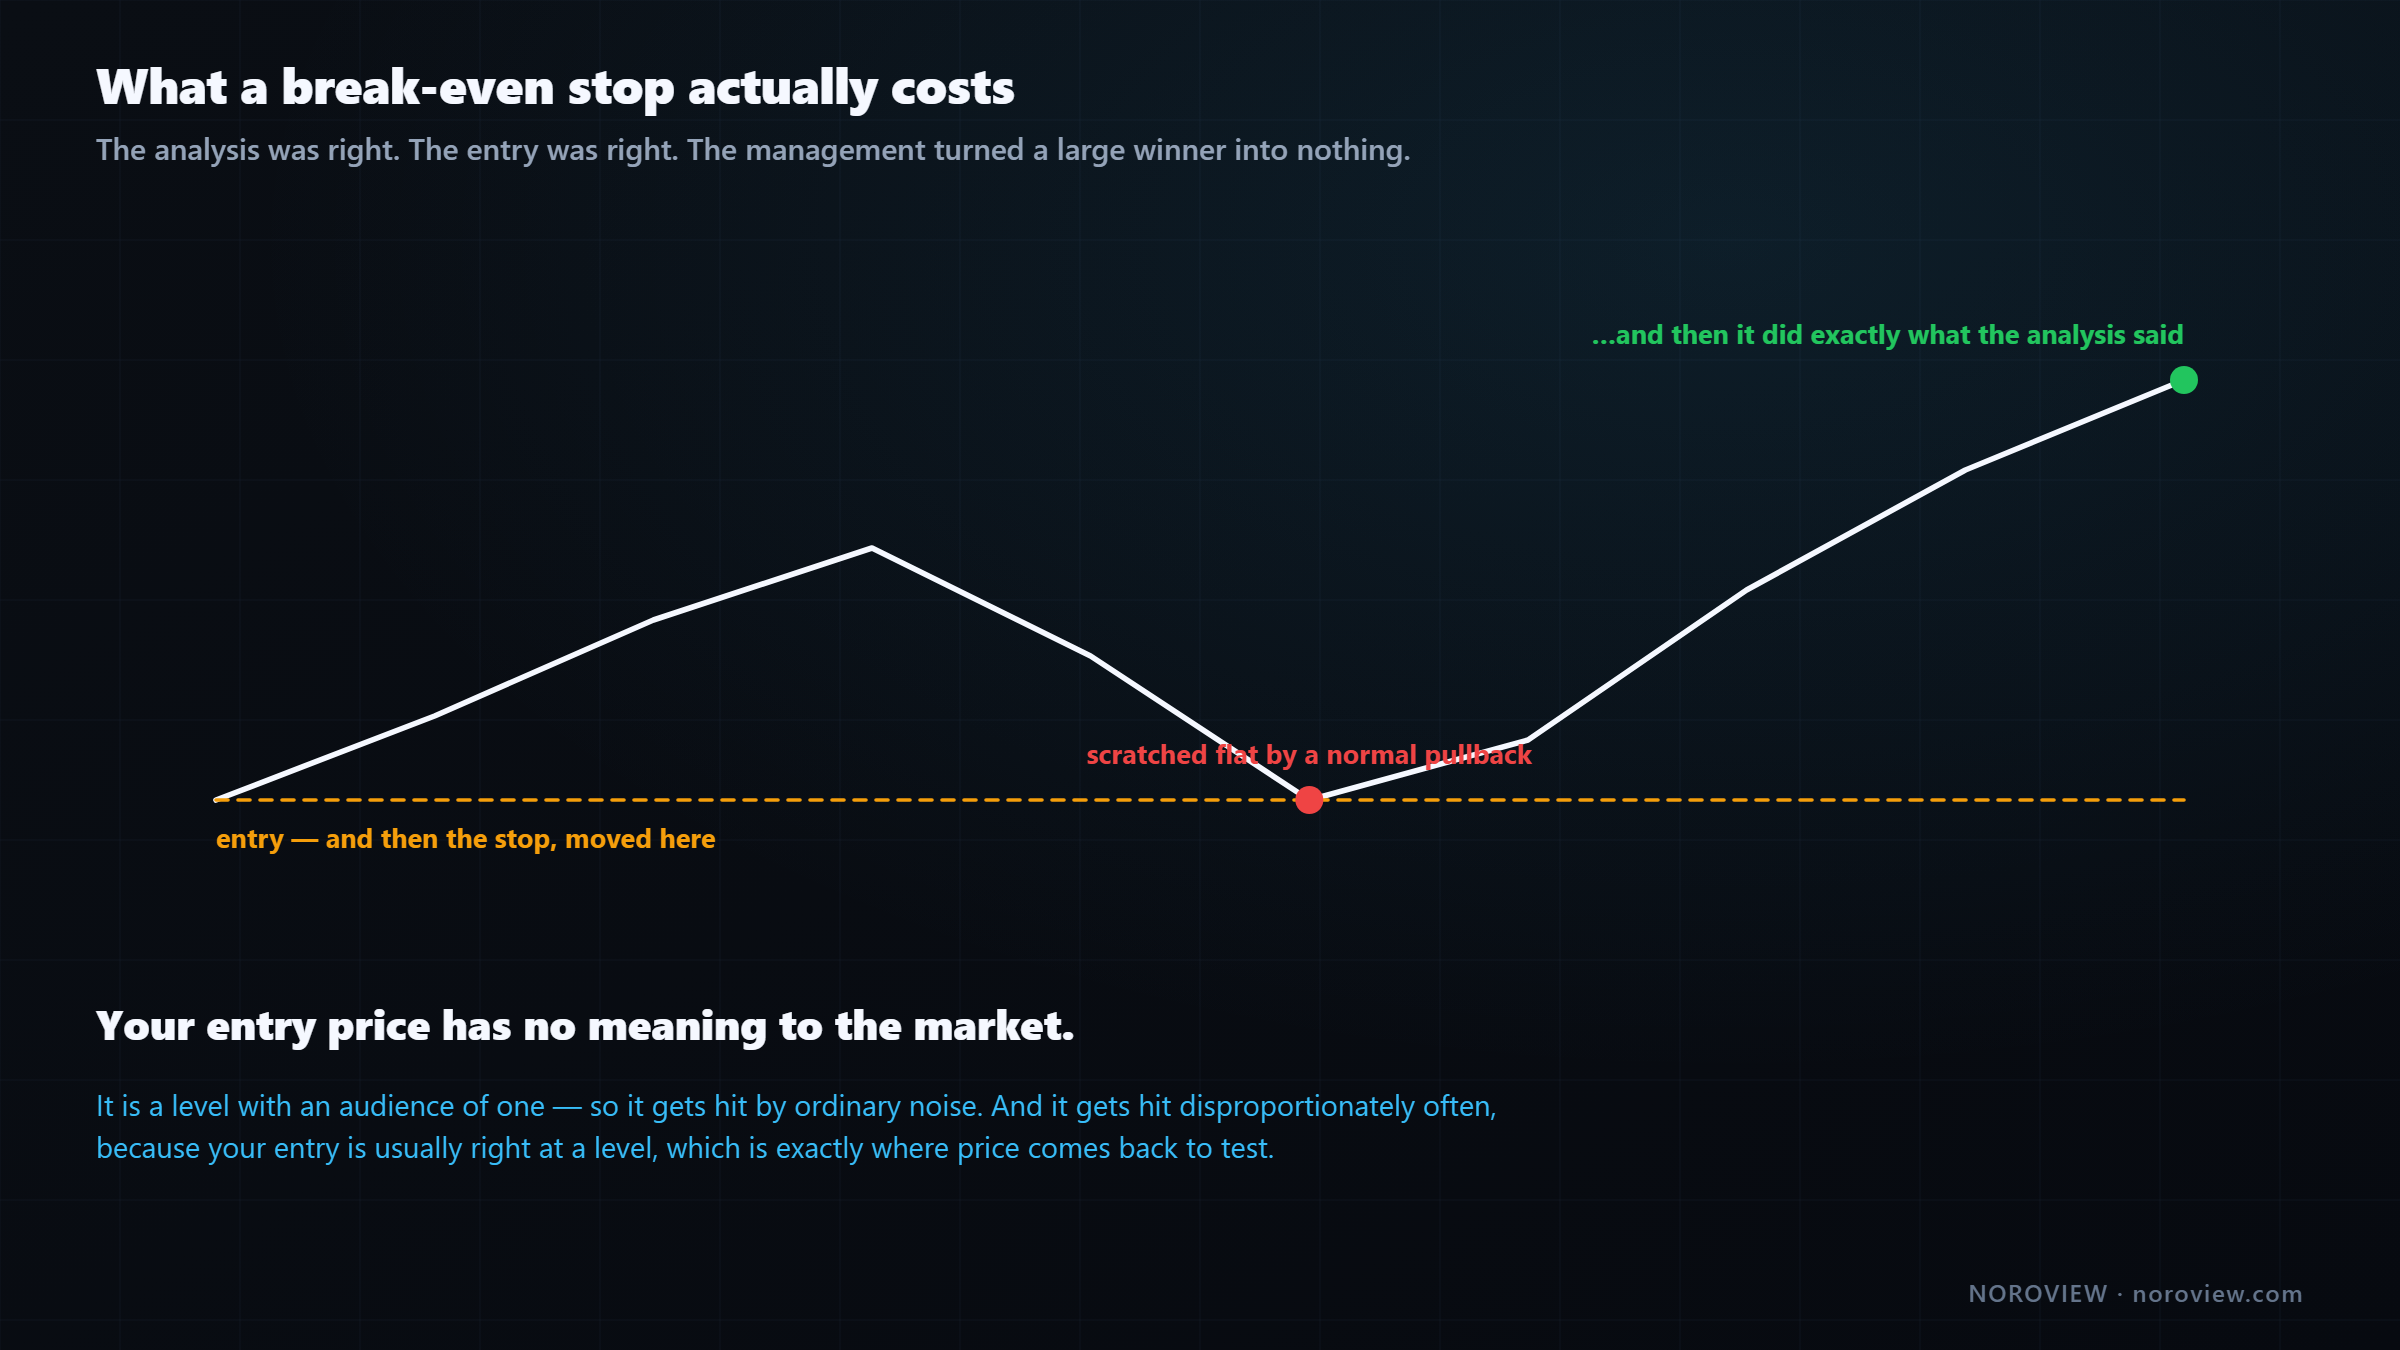
Entry at the level. Price moves up nicely, so the stop goes to entry — risk-free. Then price pulls back, touches the entry, and stops you out flat. And then it goes and does exactly what the analysis said it would.
The analysis was right. The entry was right. The pullback was a completely normal correction inside the move. And the management turned a large winner into nothing.
The real problem with break-even stops
Your entry price has no meaning to the market.
Why would price respect the exact number you happened to get filled at? It does not know about it. There is nothing structurally significant there. It is a level with an audience of one.
So a break-even stop is a stop placed at a meaningless price, which means it gets hit by ordinary noise. And it gets hit disproportionately often, because your entry is usually right at a level — which is exactly where price comes back to test.
You entered at a level. So price comes back to that level. That's what levels do.
When break-even is correct
To be fair to the technique, it is not never:
- ✓ The market has structurally changed — a new higher low has formed above your entry, so there is now a real place to hide the stop that happens to be near your entry
- ✓ Order flow has turned against you but has not invalidated the idea yet
- ✓ You have to leave your desk
- ✓ It was a counter-trend trade you never planned to hold long
Move to break-even when the market gives you a reason. Which brings us to the single most useful sentence in this article:
Move your stop when the market gives you a reason. Never when your P&L gives you a feeling.
"It's up $200 and I don't want to give it back" is a feeling. It is not information and it is not analysis. Every stop you move because of a feeling is a stop placed at a price the market has no reason to respect.
My practical rule, which you can steal:
Don't touch the stop until the trade reaches at least 1R.
And even then, move it to a structure — below the new swing low, behind the level that just formed. Somewhere the market itself has defined. Never to your entry price.
▶ Try this now
Open the paper-trading blotter, take a position, and use Edit SL/TP to move a stop to a structural swing low rather than to your entry. Then look at how far that structural stop actually is from price. That distance is what your management should respect — not the number you happened to fill at. Launch NOROVIEW free →
Partial exits
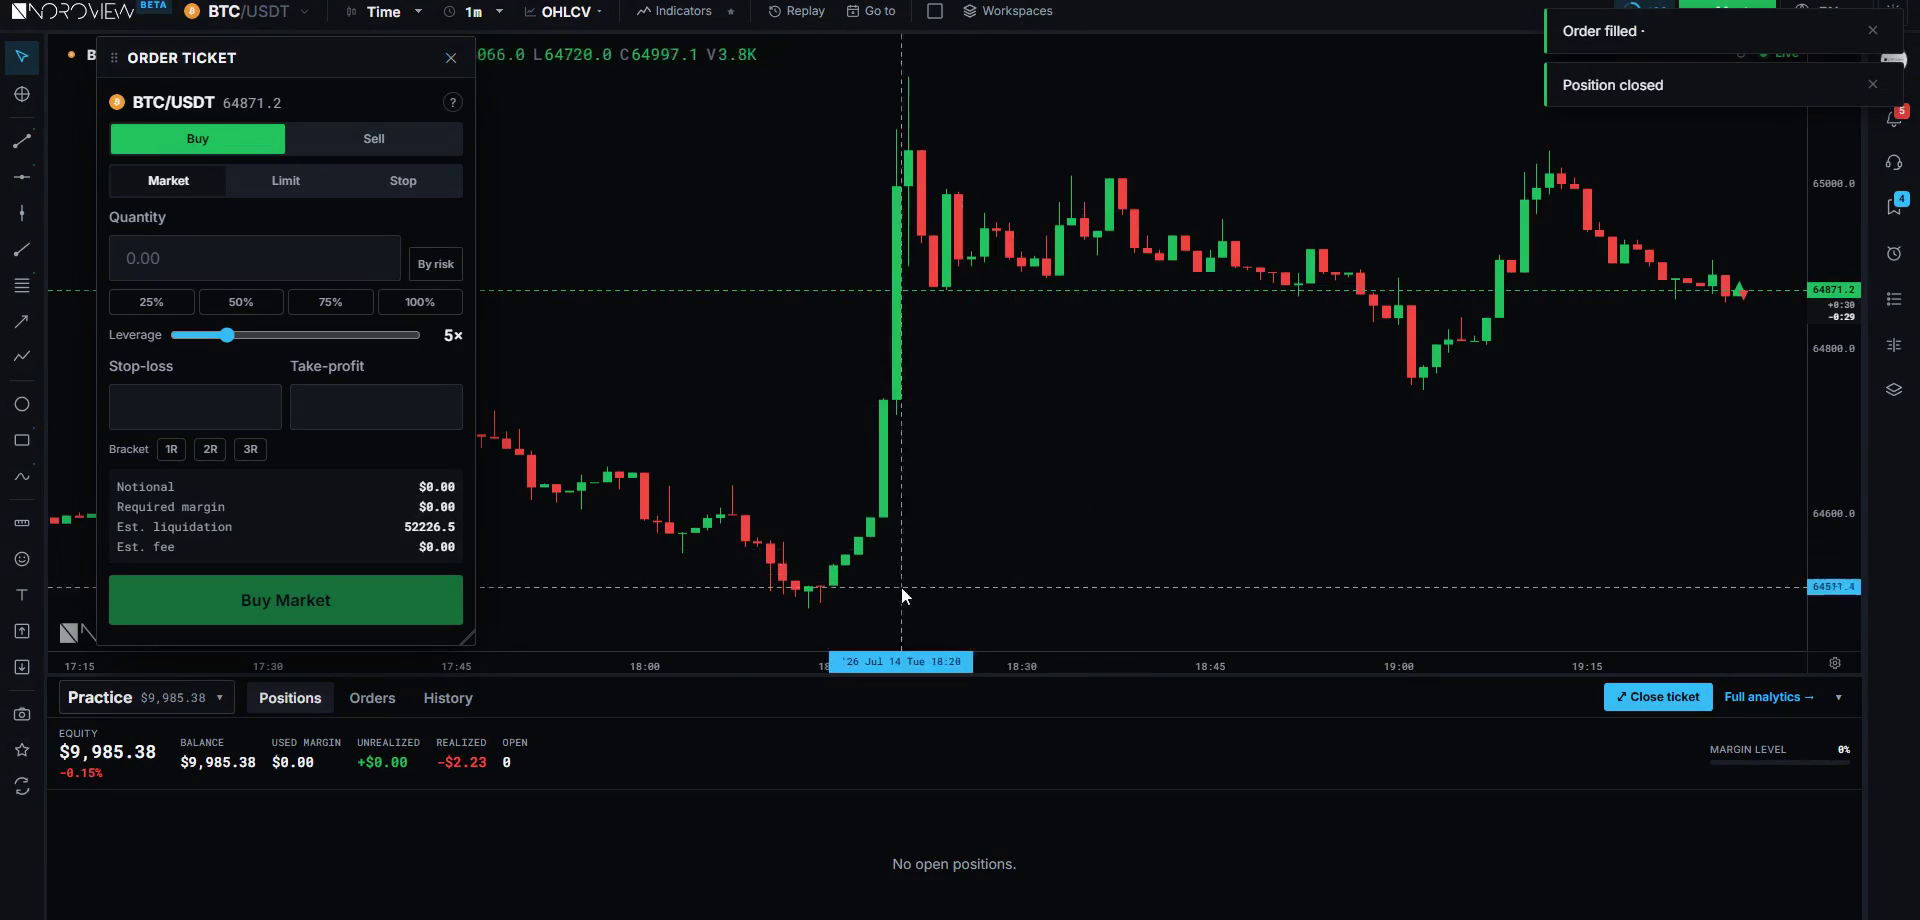
Taking part of the position off and letting the rest run (one click in the blotter: Close half).
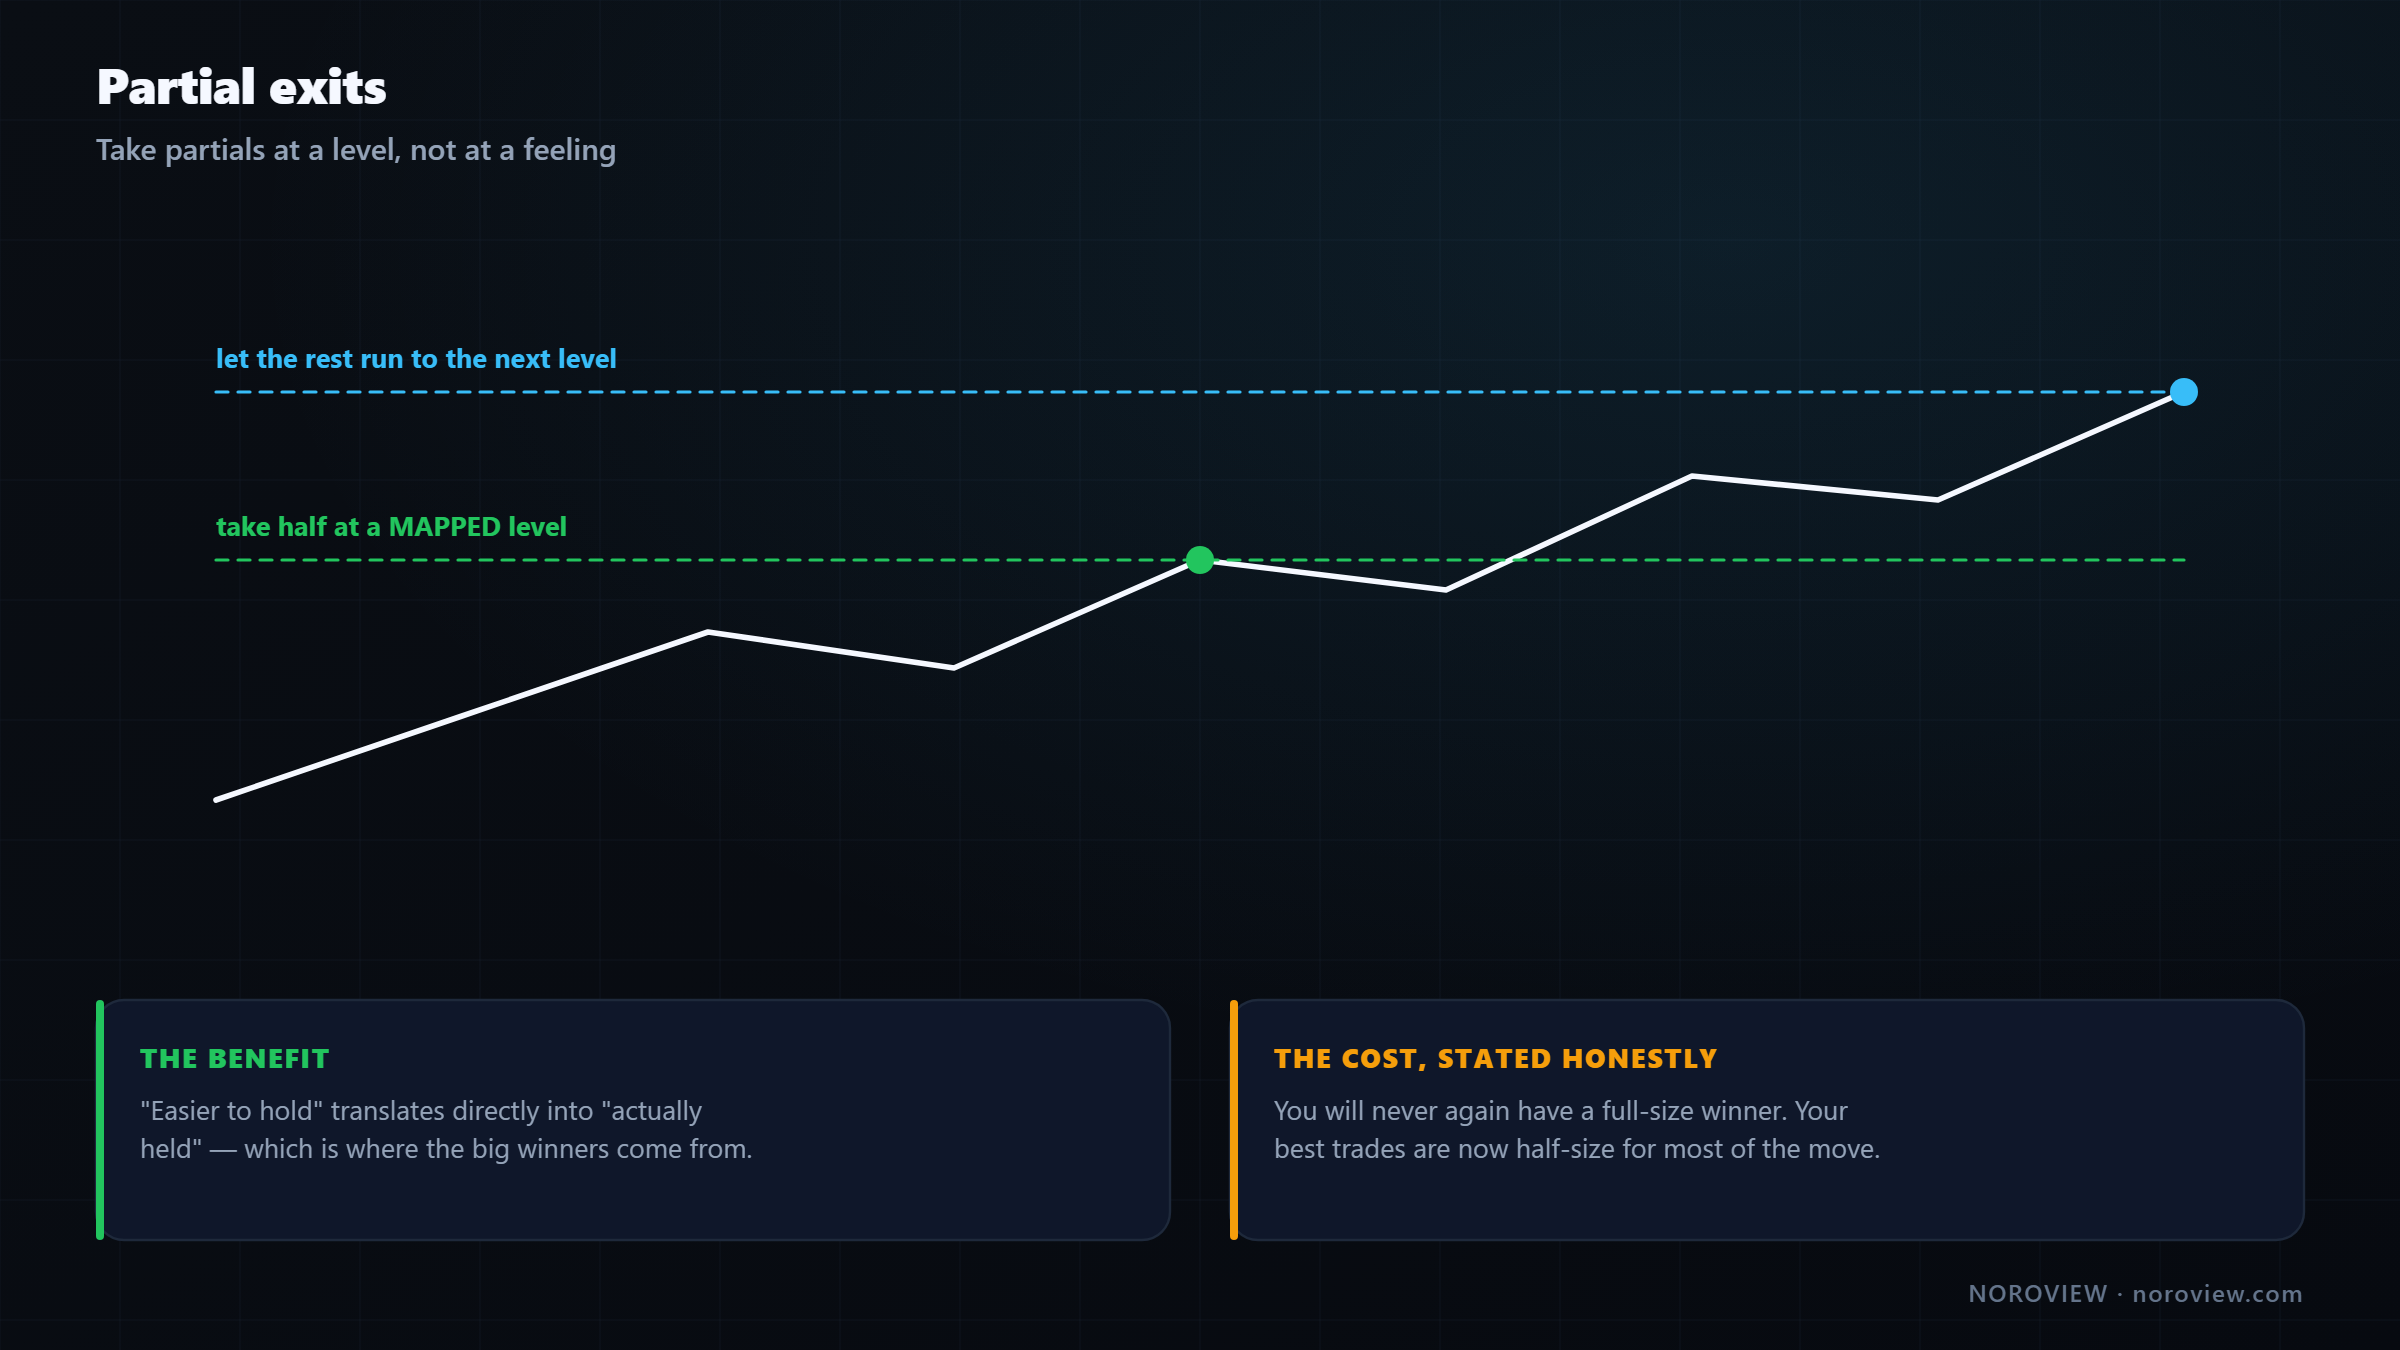
The argument for it is strong and mostly psychological — which does not make it invalid. You take half off at a sensible target and lock in a real gain. The remaining half is then much easier to hold through a pullback, and "easier to hold" translates directly into "actually held", which is where the big winners come from.
The cost, stated honestly:
You will never again have a full-size winner.
Every big win is now a half-size win. On your best trades — the ones that run four or five R and pay for a whole month — you only had half the position for most of it.
How I resolve it:
Take partials at a LEVEL, not at a feeling.
I take partials at levels from my map — an untested point of control, a value-area edge, a strong opposing level. Somewhere I already identified, before entering, as a place price is likely to react. I do not take partials because the number got big, or because it has been going my way for a while, or because I am nervous.
Same principle as the stop: the market gives the reason, not the P&L.
And my honest recommendation for where you probably are:
While you're learning: take partials. The psychological benefit is worth the cost.
You are not yet able to sit through a full-size drawdown on an open winner without doing something stupid, and a technique that keeps you in the trade is worth more than the theoretical R you gave up. Optimise for staying in the game. Later, when the process is automatic and boring, let more of the position run and see whether your average winner improves.
Trailing stops: four kinds
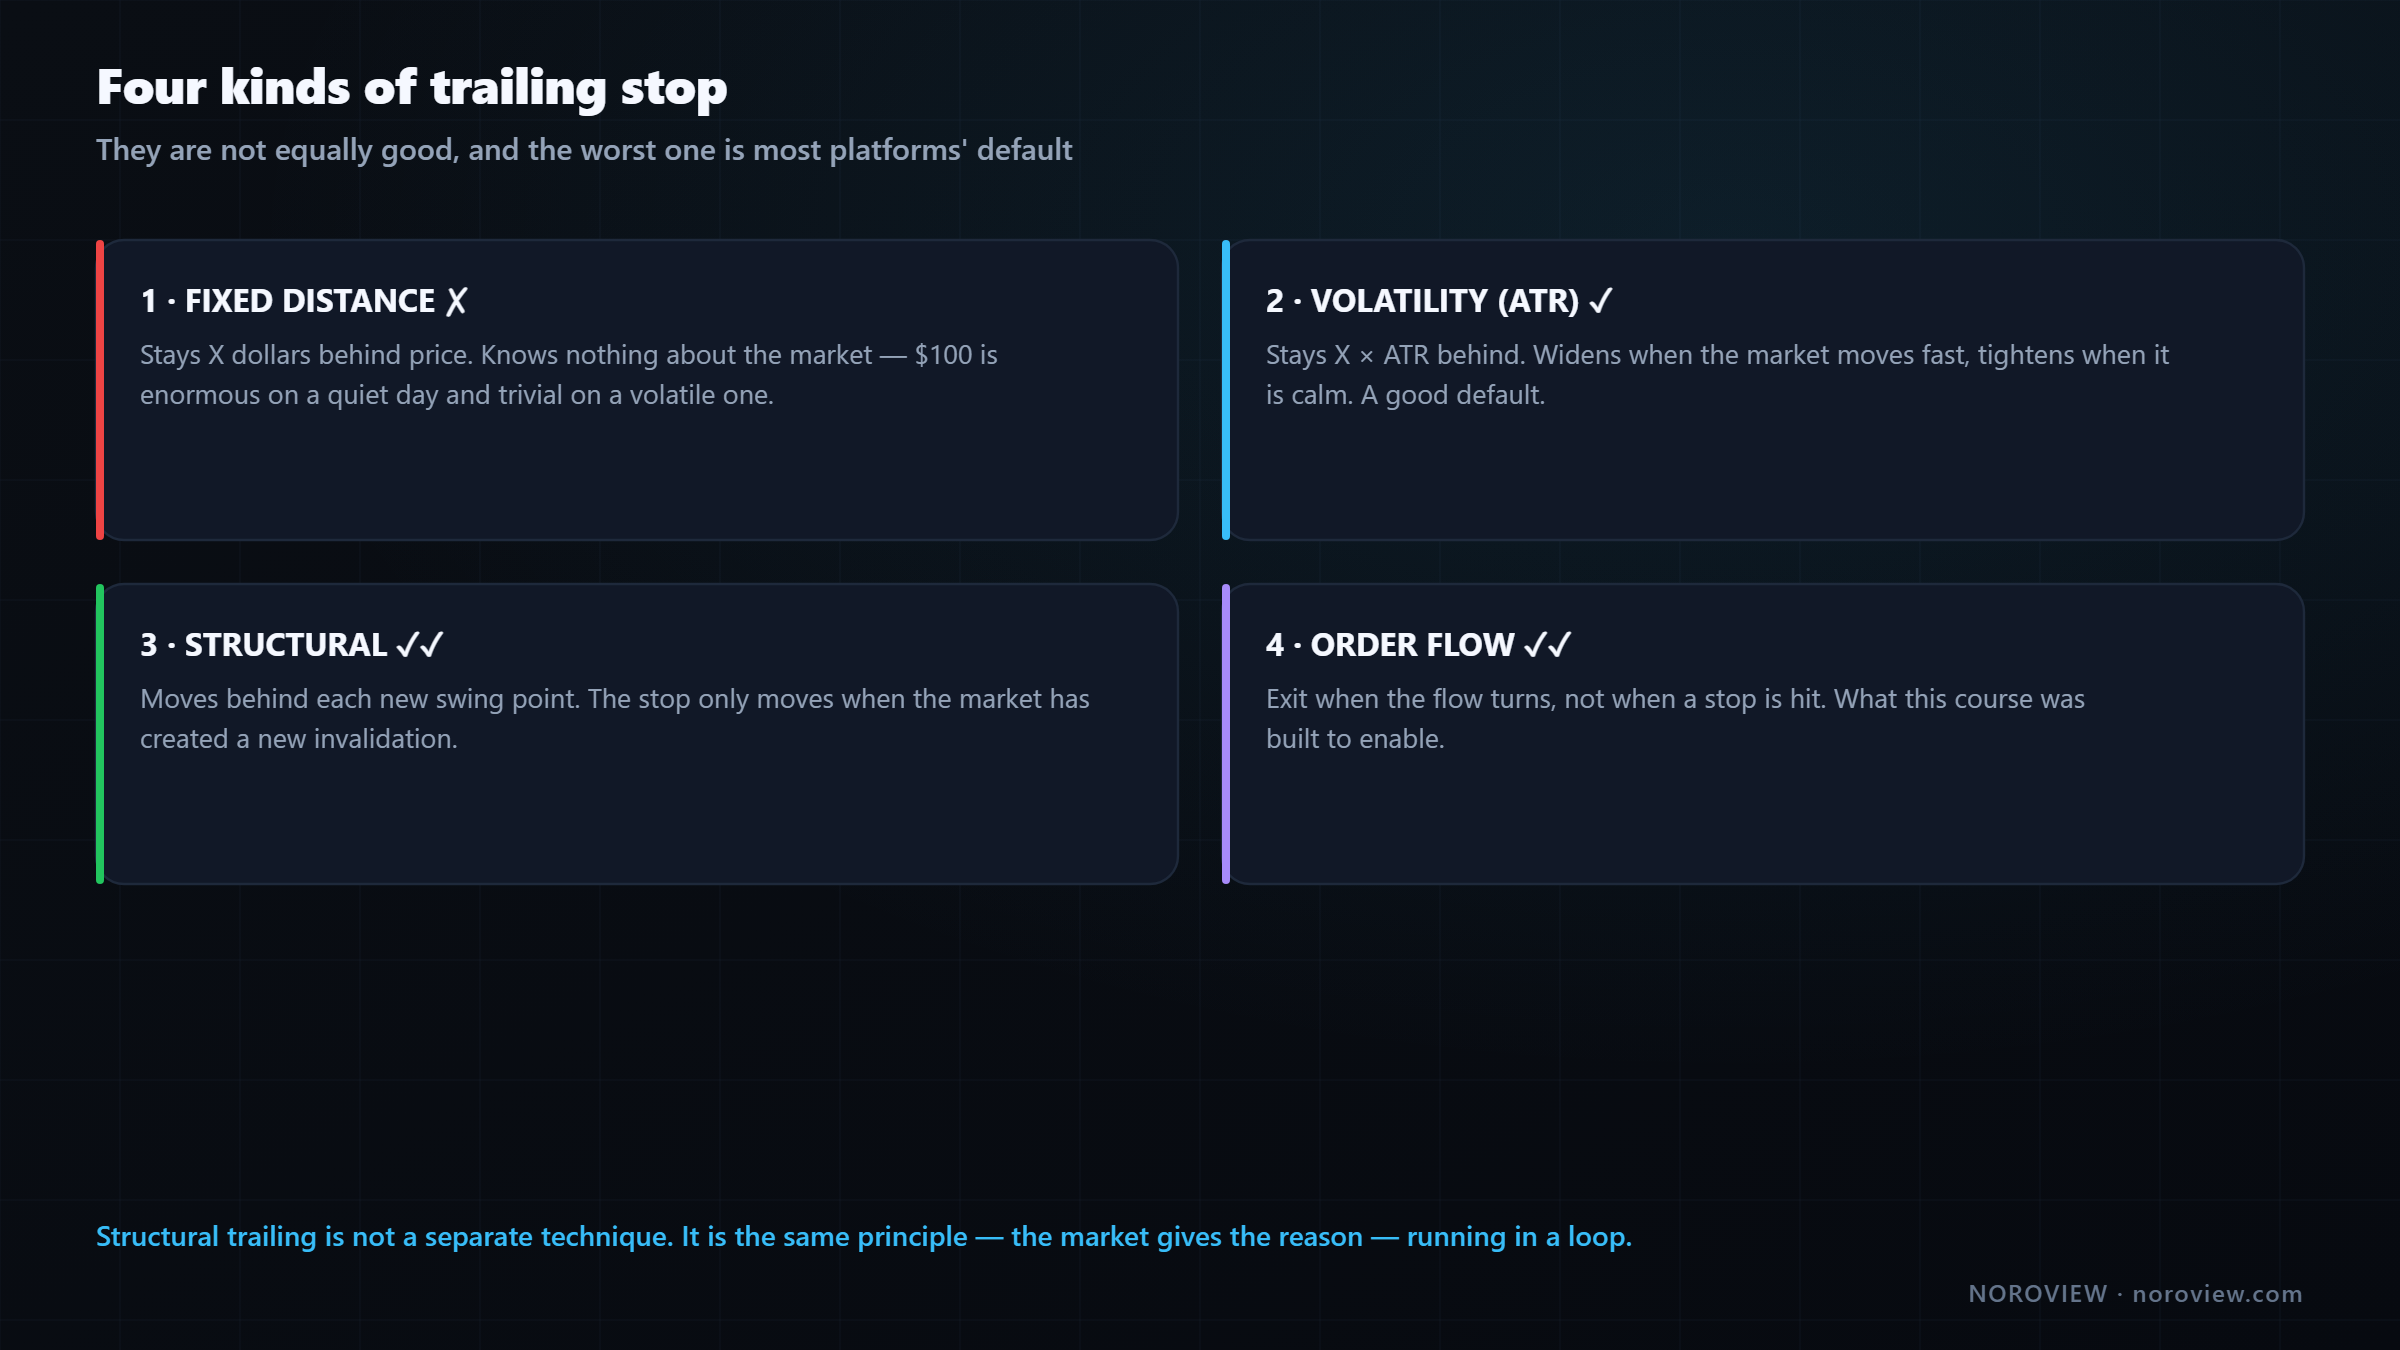
| # | Kind | Verdict |
|---|---|---|
| 1 | Fixed distance — stop stays X dollars behind price | ✗ Ignores structure. The worst option, and the default in most platforms |
| 2 | Volatility (ATR) — stop stays X × ATR behind | ✓ Adapts to conditions. A good default if you do not want to babysit |
| 3 | Structural — stop goes behind each new swing | ✓✓ Best for trends |
| 4 | Order flow — exit when the flow turns, not on a stop | ✓✓ What this course enables |
Fixed distance knows nothing about the market: $100 is enormous on a quiet day and trivial on a volatile one. You will be stopped by noise constantly, then whipsawed. Most platform defaults are this, which is why most trailing stops disappoint.
Volatility-based using ATR is much better — the stop distance widens when the market moves fast and tightens when it is calm.
Structural trailing is what I use for trends, and it comes straight out of lesson 5:
In an uptrend, the stop goes below each new higher low. Nowhere else.
Every time the market makes a new higher low, the stop moves up behind it. Not before. The stop always sits behind a place where, if price goes there, the trend structure has genuinely broken. Which means the stop only moves when the market has given you a reason — the same rule as the break-even section, applied continuously.
That is why structural trailing sits so naturally with everything else here. It is not a separate technique; it is the same principle running in a loop.
Targets and time stops
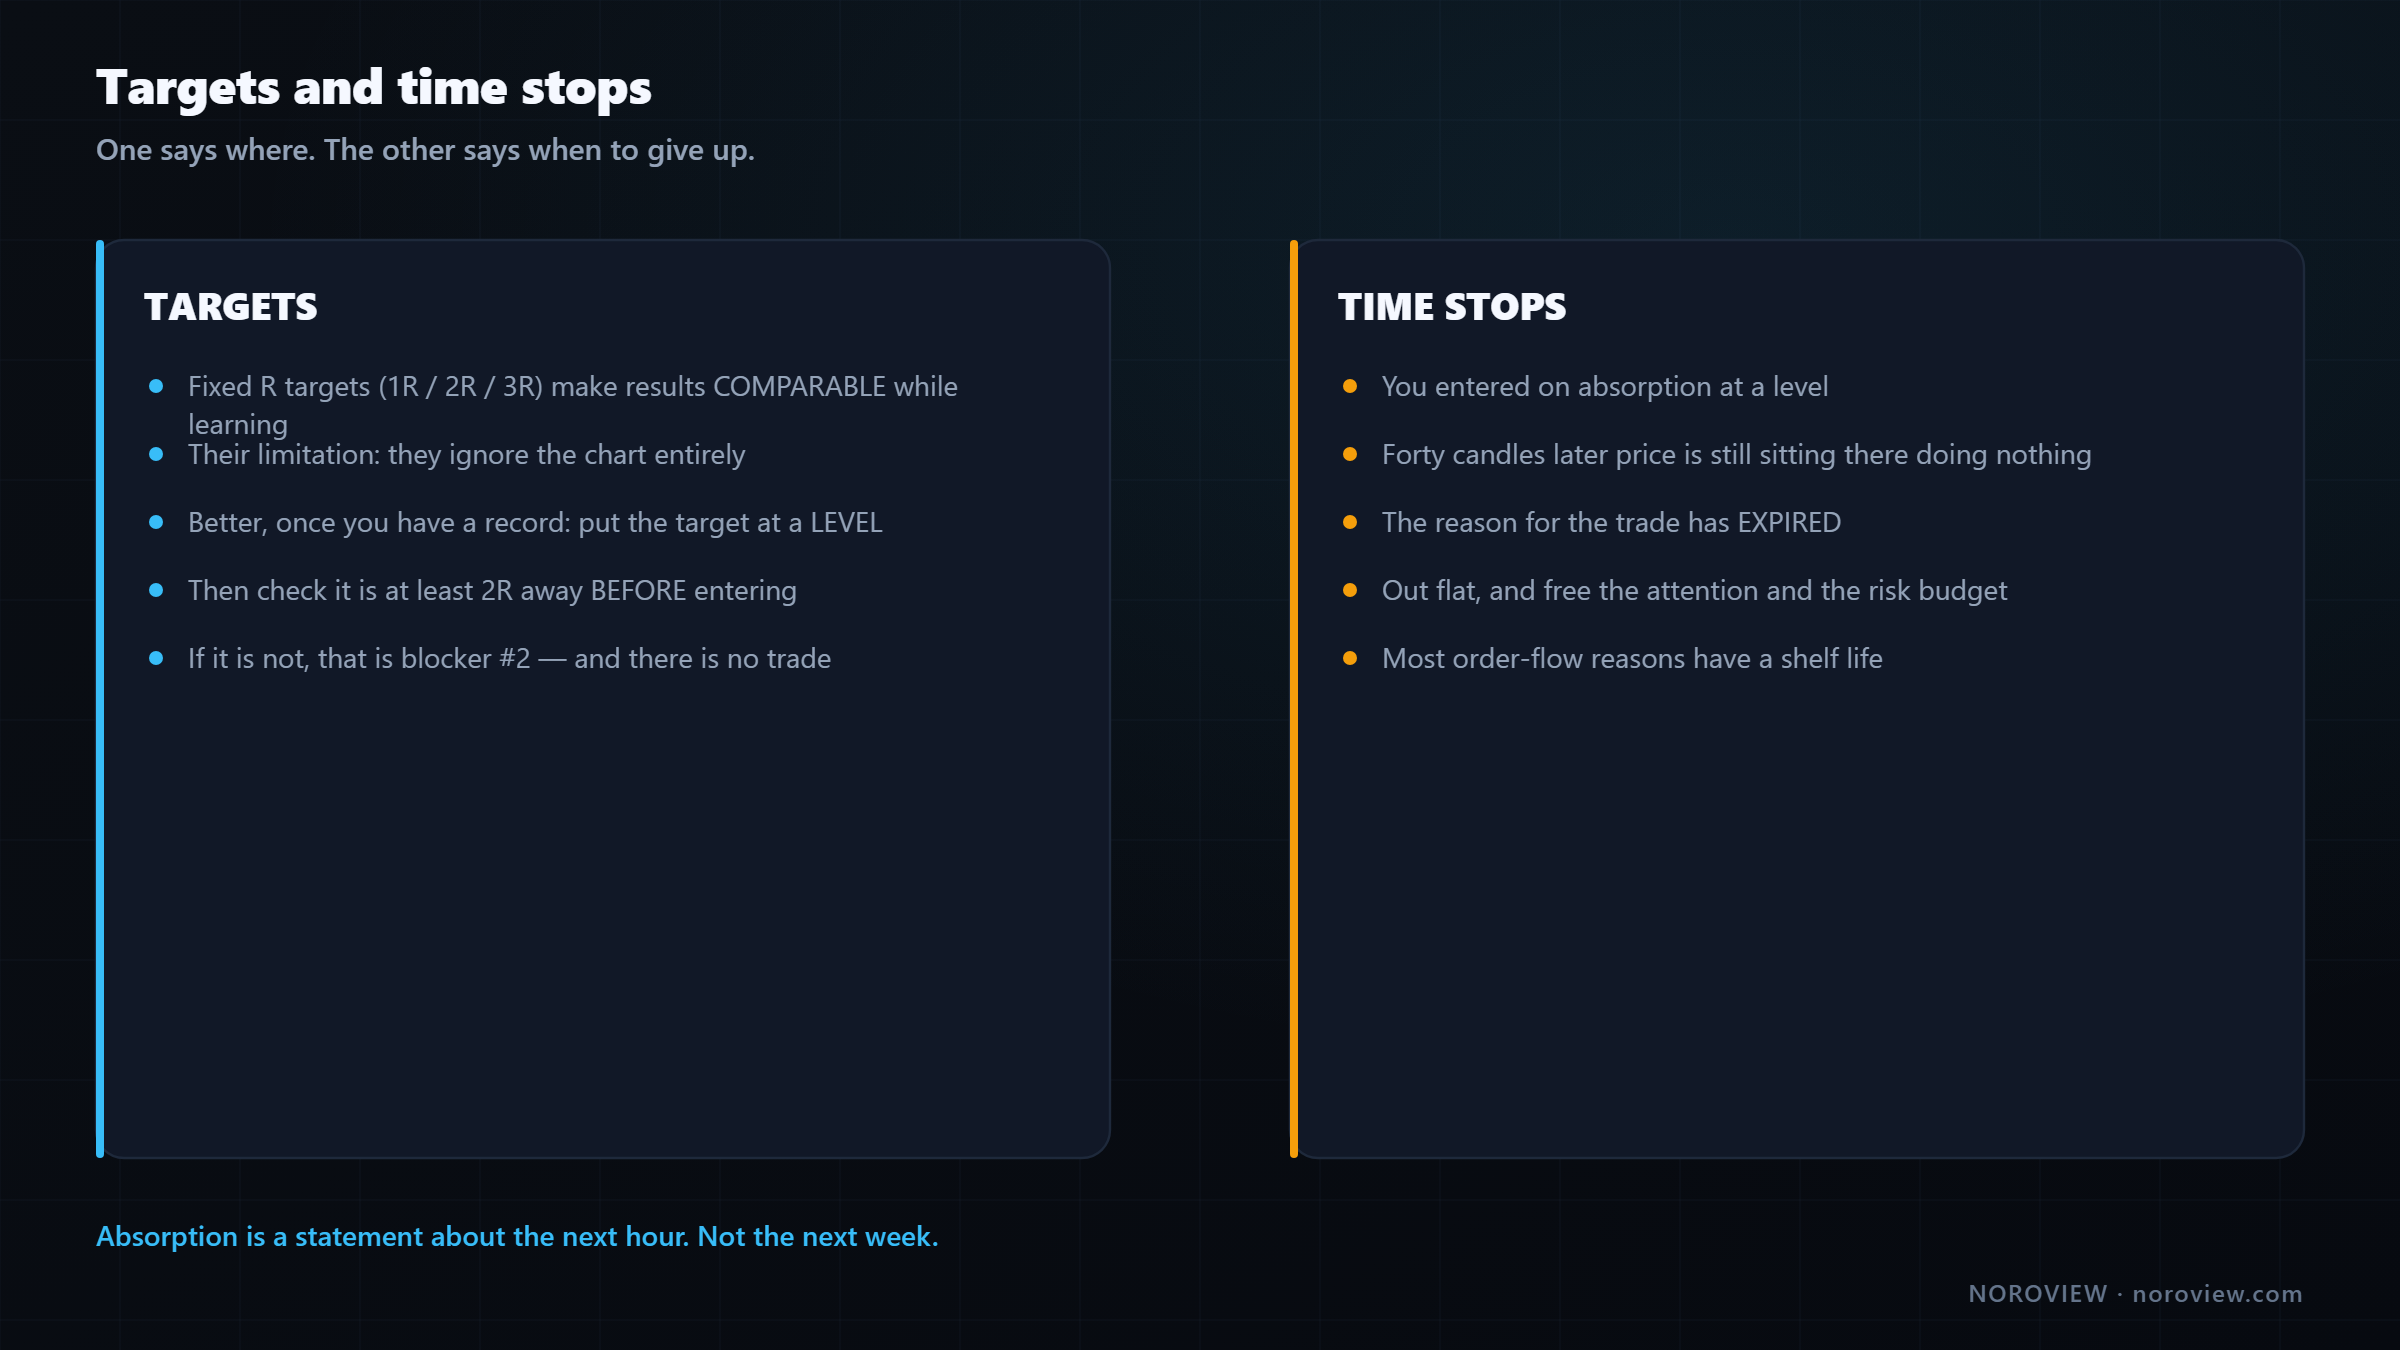
Fixed R targets (1R / 2R / 3R bracket chips on the order ticket) are excellent for learning, and I would recommend them while you are building a record — because a fixed R target makes your results comparable. Every trade measured in the same units, so your statistics mean something and you can see whether your edge is real before adding discretion.
The limitation is that a fixed R target ignores the chart. 2R might sit in the middle of a thin area where price never stops, or just beyond a major level price will never reach.
Better: put the target at a LEVEL, and check it's at least 2R away before entering.
Put your target at a level from your map — an untested POC, a value-area edge, an unfinished auction. Then check it is at least 2R away before you enter. If it is not, that is blocker #2, and there is no trade.
Time stops
If it hasn't worked in a reasonable time, the reason for the trade has expired.
You entered on absorption at a level, and forty candles later price is still sitting there doing nothing. The absorption was not followed through. Nothing is happening. You do not have to wait for the stop — getting out flat or with a small loss, and freeing your attention and your risk budget for a better setup, is often the correct decision.
Notice what a time stop really is: an admission that your reason had a shelf life. Most order-flow reasons do. Absorption is a statement about the next hour, not the next week.
Measure whether you are over-managing
NOROVIEW's paper-trading performance hub tracks average MFE, average MAE, R-multiples and expectancy — on a record that cannot be edited or back-dated. Create a free account → · Compare plans
Adding and reversing
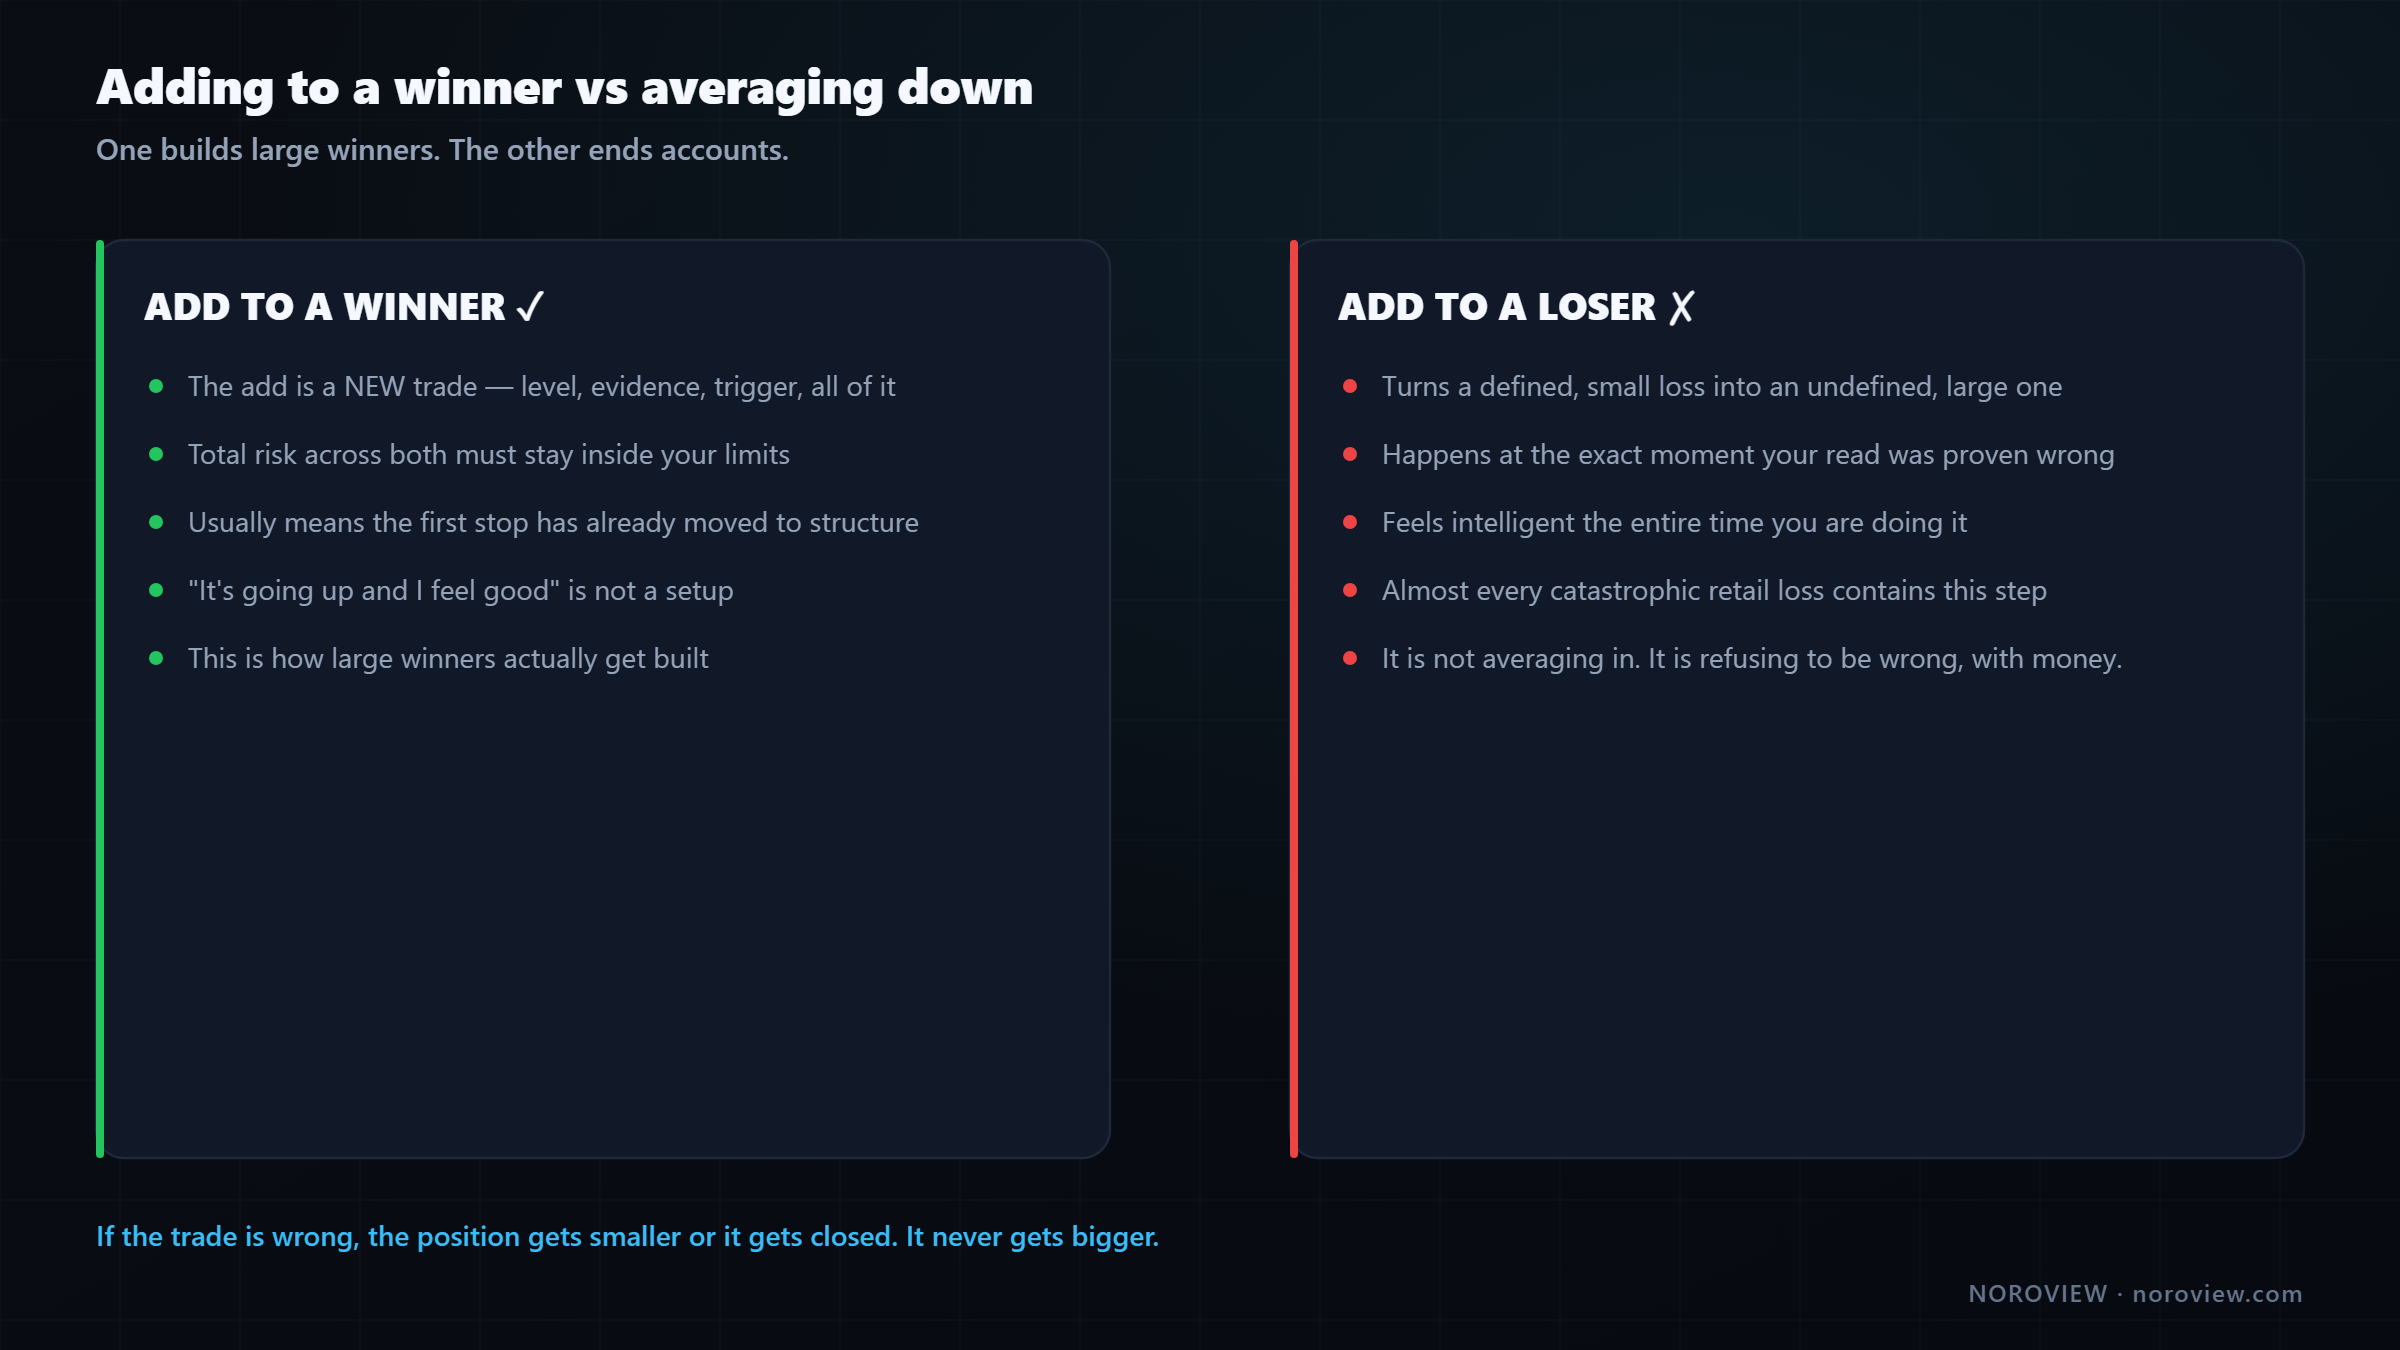
Adding to a winner (pyramiding) is legitimate and it is how large winners get built. Two rules, neither optional:
- The add needs its own valid setup — level, evidence, trigger. All of it. The add is a new trade and it needs the full model. "It's going up and I feel good" is not a setup.
- Total risk across both must still be inside your limits. Usually that means the first position's stop has already moved to a structure, so total exposure has not grown.
And never, under any circumstances, add to a loser.
Adding to a loser isn't "averaging in." It's refusing to be wrong, with money.
Averaging down turns a defined, small loss into an undefined, large one — and it feels intelligent while you do it. Almost every catastrophic retail loss story contains this exact step.
If the trade is wrong, the position gets smaller or it gets closed. It never gets bigger.
Reversing — closing and immediately flipping to the other side — is legitimate when the evidence genuinely flips. You were long on absorption at a level, the level broke with real aggression, and now there is a short setup at the same place.
Reverse only if the SHORT would pass your full checklist on its own.
The test is simple: if you were flat right now, would you take this short? Full model, all four conditions, blocker list clear? If yes, take it. If no, you are not reversing — you are chasing the thing that just hurt you, and that is tilt wearing a technical costume.
The order-flow exit
This is the technique the whole course was built to enable, and it is not available to somebody reading a normal chart.
Exit when the order flow turns. Not when your stop is hit.
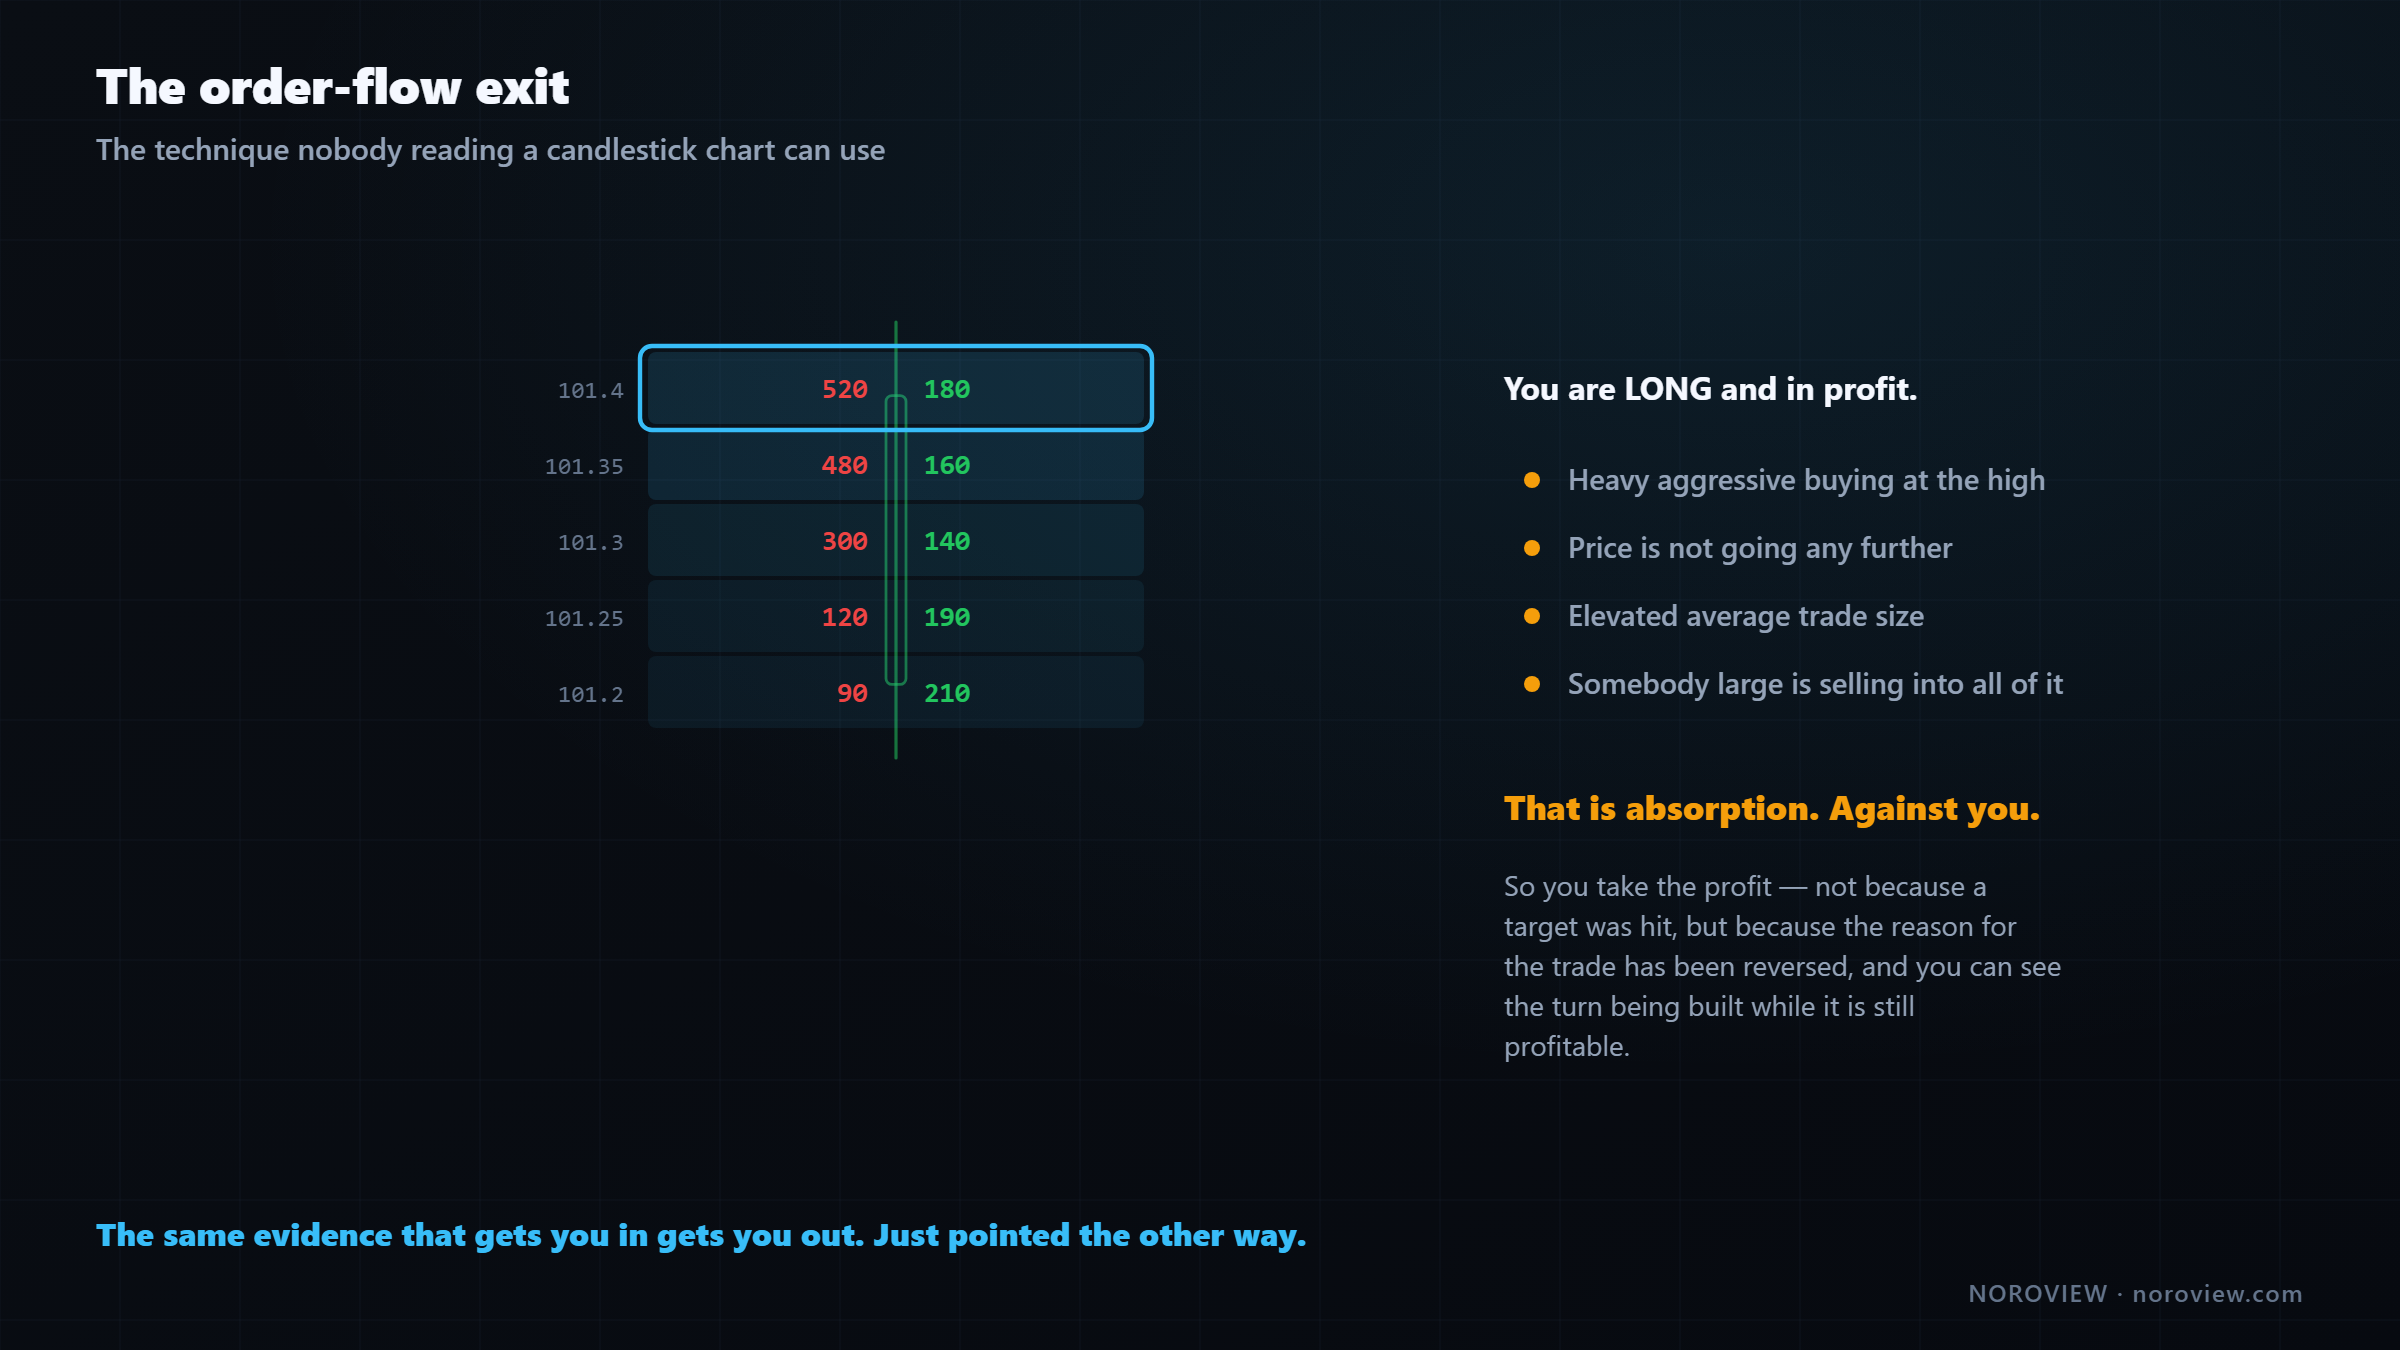
You are long from a level. It has worked, price is up. And now, up here, heavy aggressive buying appears at the high — and price is not going any further. Elevated average trade size. Somebody large is selling into all of that buying.
That is absorption. Against you. Everything lesson 10 taught you about spotting a top is happening right now, in your favour position, before price has turned.
So you take the profit. Not because your target was hit, not because your stop was hit — because the reason for the trade has been reversed. The buyers who were pushing your position are now being absorbed, and whoever is absorbing them will be defending this price.
The same evidence that gets you in gets you out. Just pointed the other way.
Somebody reading a candlestick chart has to wait for price to turn and give back part of the move. You can see the turn being built while it is still profitable.
What to watch for while in a long:
- Absorption against you at a high — heavy buying, no progress
- CVD diverging from price — your move is running out of fuel
- A big participant appearing on the other side (elevated ATS against you)
- Price reaching a level from your map with sellers waiting
- Exhaustion — your side's volume fading at each new push
And the discipline that must go with it, or this becomes an excuse:
Define what would make you exit early BEFORE you enter.
Define your early-exit conditions in the same breath as your stop and target. Otherwise "the order flow turned" becomes a story you tell yourself every time you feel nervous, and you will exit every trade at the first pullback and call it skill.
Diagnosing yourself with MFE and MAE
How do you know if you are over-managing? You measure it.
| MFE | Maximum Favourable Excursion — how far your trades went in your favour before you closed |
| MAE | Maximum Adverse Excursion — how far they went against you before they worked |

| Reading | Diagnosis |
|---|---|
| MFE much bigger than avg win | You are exiting too early. Loosen management |
| MFE ≈ avg win | You are capturing most of what is there. Good |
| MAE consistently tiny | Your stops may be wider than they need to be |
| MAE close to your stop often | Your stops are correctly placed. Leave them |
If your trades typically run 4R in your favour and your average win is 1R, you are leaving 3R on the table on every winner. That is not bad luck — that is a management problem, and it is fixable.
On the other side, if your MAE is consistently tiny — trades almost never go against you before working — your stops may be wider than they need to be, and you could take the same risk with a larger position.
This is the difference between guessing and improving.
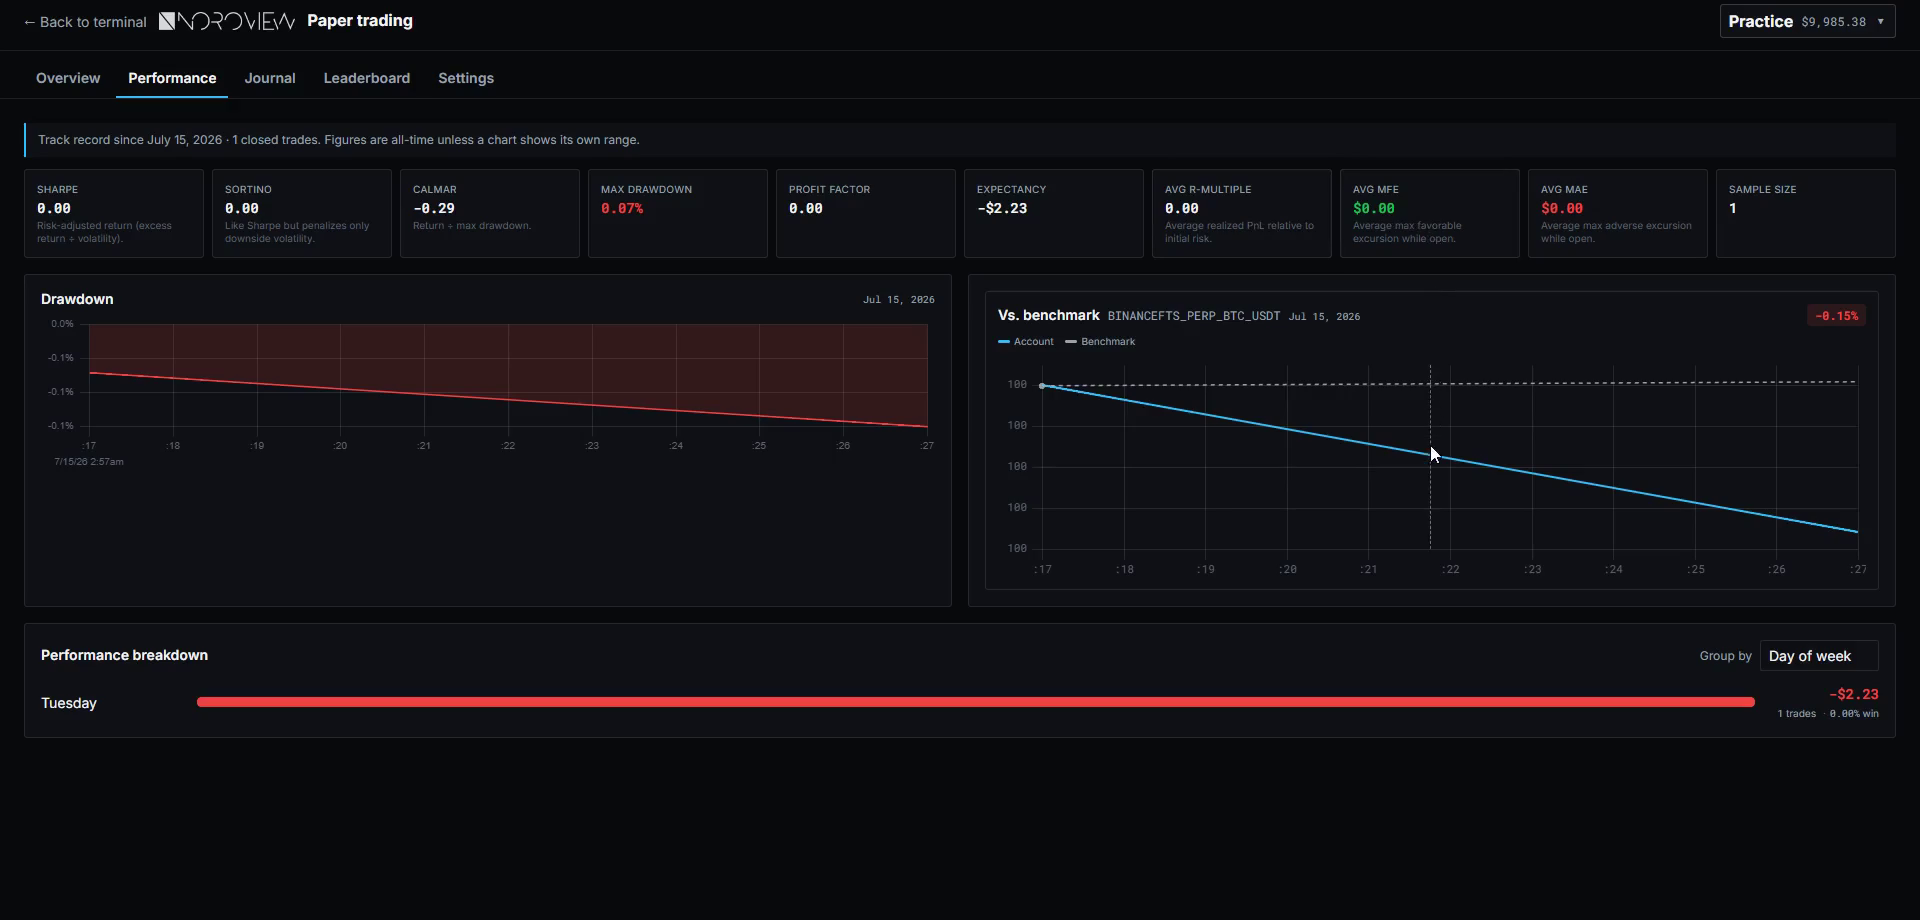
Both figures sit in the Performance tab of the paper-trading hub, alongside your average R-multiple, expectancy, Sharpe/Sortino/Calmar, and a benchmark against simply holding Bitcoin.
My default management plan
Decided before entry, every time:
- Stop behind the level, sized from that distance. Not touched until at least 1R.
- Target at a level from the map, verified at ≥2R before entry.
- Partial at the first mapped level on the way (while learning).
- Structural trail after that — behind each new swing, never before.
- Early-exit conditions written down before entry: absorption against me, CVD divergence, or a big participant appearing on the other side.
- A time stop: if the reason has not produced anything within a defined number of candles, out flat.
Six lines. Written before the entry, not invented during it. That is the entire discipline — every decision made while you were calm, so nothing has to be decided while you are in a position.
Common mistakes
- Moving the stop to break-even because the P&L got big. Your entry price has an audience of one.
- Taking partials out of nervousness rather than at a mapped level.
- Using a fixed-distance trailing stop because it is the platform default.
- Trailing before the market makes a new structural point.
- Averaging down and calling it averaging in.
- Reversing into the market that just hurt you without the short passing its own checklist.
- Inventing "the order flow turned" after entry instead of defining it before.
- Never measuring MFE, and therefore never discovering you are exiting three-quarters of the way too early.
Your homework
- Write your six-line default management plan and put it next to your blocker list.
- Take twenty paper trades with fixed 2R targets and no discretionary exits at all. Record the MFE of each one.
- Compare average MFE against your average win. The gap is your over-management, measured in R. Then loosen one thing — one — and take another twenty.
Three things to remember
- Every management technique reduces variance and reduces your average winner. Most retail traders are far past the point where that trade is worth it.
- Move the stop when the market gives you a reason, never when your P&L gives you a feeling — and move it to a structure, not to your entry.
- The order-flow exit is what this course was built for. The same evidence that gets you in gets you out, and you can see the turn being built while the trade is still profitable.
The end of the course — what to do now
That is all sixteen lessons. Analysis, then technique, then trading, in that order.
Here is the honest summary of what you now have, and what you do not.
You have a complete method. A way to read the raw buying and selling inside a candle, a way to build a level map from where business actually happened, an entry model with a veto list, a risk framework that survives losing streaks, and a management plan. That is genuinely everything you need. There is no advanced course, no private group, and no "real stuff" somewhere else.
What you do not have yet is screen time, and nothing on this site can give it to you. Reading order flow is a perceptual skill — it comes from hours of exposure until the patterns stop being things you calculate and start being things you notice.
So the next step is not another article. It is this:
- Twenty market-replay sessions, one setup at a time, before you take another live trade.
- Twenty logged paper trades graded on process, not on profit.
- Then the $100 stage from lesson 15, judged the same way.
- Then a few hundred trades before your results describe your skill rather than your luck.
Six months to two years. Most people around two. Do not quit your job, do not compare yourself to a screenshot, and do not size up after a good week.
Watching does not make you a trader. Screen time makes you a trader. Twenty replay sessions beat twenty videos.
And remember why any of this matters at all. Money is chapter one.
Wealth is more than money.
← Previous: How to Day Trade Crypto With Order Flow · Course index: Order Flow Trading Course · Start again: Order Flow Trading for Beginners
Frequently asked questions
Should I move my stop to break-even? Only when the market gives you a structural reason — a new swing point has formed above your entry, order flow has turned, or you have to leave your desk. Moving a stop to your fill price because the position is profitable places it at a price with no significance, where ordinary noise will hit it.
When should you take partial profits? At levels you identified before entering — an untested point of control, a value-area edge, a strong opposing level — rather than when the number gets uncomfortable. While you are learning, taking partials is usually worth its cost, because a position you can actually hold beats a theoretically larger one you cannot.
What is the best type of trailing stop? Structural trailing, where the stop moves behind each new swing point, is generally best in trends because it only moves when the market itself has created a new invalidation. Volatility-based trailing using ATR is a reasonable second. Fixed-distance trailing is the weakest and the most common default.
What is a time stop in trading? A time stop closes a position when the reason for entering has not produced a result within a defined period. Order-flow reasons have a shelf life: absorption at a level is a statement about the next hour, not the next week. If nothing has happened, the risk budget is better spent elsewhere.
Is it OK to add to a winning trade? Yes, provided the addition has its own complete setup — level, evidence and trigger — and total risk across both positions stays within your limits. That usually means the original stop has already moved to a structural point. Adding because a trade feels good is not a setup.
Why should you never average down? Because it converts a defined, small loss into an undefined, large one, and it does so at the exact moment your read has been proven wrong. If a trade is wrong the position should get smaller or be closed. Almost every catastrophic retail loss involves this step.
How do I know if I am taking profit too early? Compare your average maximum favourable excursion with your average win. If trades typically run 4R in your favour and your average win is 1R, you are exiting far too early and leaving most of the move behind. If the two figures are close, your management is roughly right.
What is the order-flow exit? Closing a profitable position when the order flow reverses — absorption appearing against you, CVD diverging, or a large participant showing up on the other side — rather than waiting for a target or stop. It requires that you define the exit conditions before entering, or it becomes a rationalisation for nerves.
Sources
- Investopedia — trailing stops
- Odean, T. (1998). Are Investors Reluctant to Realize Their Losses? — Journal of Finance
Soroosh Moghimi — six years inside financial markets: algorithmic trading, HFT, crypto and AI, after a decade building startups. He publishes this course free because he already paid for the lessons in it. There is no paid course and no signal group. @sorooshmoghimi · About
Start reading real order flow
You cannot learn this from a candlestick chart, and you do not need to spend a cent to begin. The standard footprint chart is free for every NOROVIEW user, market replay is free, and the paper-trading simulator is free.
Open NOROVIEW free → · Compare plans →
⚠️ DISCLAIMER — EDUCATIONAL CONTENT ONLY
This article is for educational and informational purposes only. It is not financial, investment, or trading advice, and nothing in it is a recommendation to buy, sell, or hold any asset. Trading cryptocurrencies and leveraged derivatives is high risk and can result in the loss of some or all of your capital. Only risk money you can afford to lose. Any levels, indicators, signals or results shown are illustrative and are not a promise or prediction of future performance. Charts may be shown on a demo or paper-trading account and do not represent real trades or returns. Always do your own research. You alone are responsible for your decisions.
Keep reading
Related posts

15. How to Day Trade Crypto With Order Flow (Starting Small)
How to day trade crypto with order flow: exchange security, spot vs perpetuals, leverage and liquidation, order types, fees, and an honest $100 starting plan.

14. Risk, Drawdown and the Mind: Day Trading's Real Edge
Day trading risk management and psychology: position sizing math, drawdown recovery arithmetic, hard limits, decision vs outcome, and the five states that break traders.

13. Fair Value Gaps, Confirmed With Order Flow
Most fair value gaps do nothing. Five order-flow checks that tell you in advance which FVGs are worth trading and which are decoration.

5. Market Structure and Trend: How to Pick Your Side Objectively
How to identify market structure objectively: higher highs and higher lows, swing point rules, impulse vs correction, and the arithmetic behind trading with the trend.

11. My Order Flow Entry Model, Step by Step
A complete order flow entry model: the four conditions, the exact trigger candle, the value-area filter, and the ten-item blocker list that vetoes a trade.

9. The Only Support and Resistance Levels I Actually Trade
Order flow support and resistance: how to find levels built from participants rather than price — high-ATS levels, automatic S&R and untested POCs.
Discussion (0)
Want to join the discussion? Comments live inside the platform.
Open NOROVIEW