
15. How to Day Trade Crypto With Order Flow (Starting Small)
How to day trade crypto with order flow: exchange security, spot vs perpetuals, leverage and liquidation, order types, fees, and an honest $100 starting plan.
15. How to Day Trade Crypto With Order Flow (Starting Small)
⚠️ Education only. Nothing here is financial advice, and nothing here is a recommendation to trade any particular product or venue. Trading crypto derivatives is high risk and you can lose your money. Availability of derivatives and leverage varies by jurisdiction. Full disclaimer at the bottom.
To day trade crypto with order flow you analyse on the venue with the best data and execute on the venue where your account is. Everything before this article was analysis. This one is the exchange itself: security, spot versus perpetual futures, how leverage and liquidation actually work, every order type you need, why fees matter enormously on a small account, and an honest starting plan.
In lesson 1 there was one rule: do not trade real money until I tell you. That rule expires here — conditionally. Three things have to be true first:
- You have taken at least 20 paper trades, logged
- You have your rules written down, on paper
- You can explain your entry model out loud in one minute, without looking at anything
If any of those is not true, read on, but the money part waits. Somebody who cannot state their model in a minute does not have a model — and putting money behind a thing you cannot describe is gambling with extra steps.
Take the twenty paper trades first — the simulator is free and it fills only on the live market.
What you'll learn in this lesson
- The exchange security checklist to complete before you fund anything
- Spot vs perpetual futures, and what funding rates actually tell you
- Why leverage does not increase your risk — and the one way it genuinely does
- Every order type you need, and why a protective stop should be stop-market
- Maker vs taker fees, and the fee drag that eats small accounts
- The two-screen workflow: analysis on one venue, execution on another
- The $100 plan, with the awkward arithmetic done honestly
Lesson 15 of 16 · Part 3 — Trading. Part of the free order flow trading course. Previous: Risk Management and Psychology. Next: Trade Management.
▶ Prefer to watch it?
The twenty paper trades that come first: Free Crypto Paper Trading on the Live Market (Ep 10) · Locking your account down: Account Settings, Security, Shortcuts & Billing (Ep 7)
Security first
This goes first on purpose. The number of people who have traded well and then lost everything to a security failure is not small.
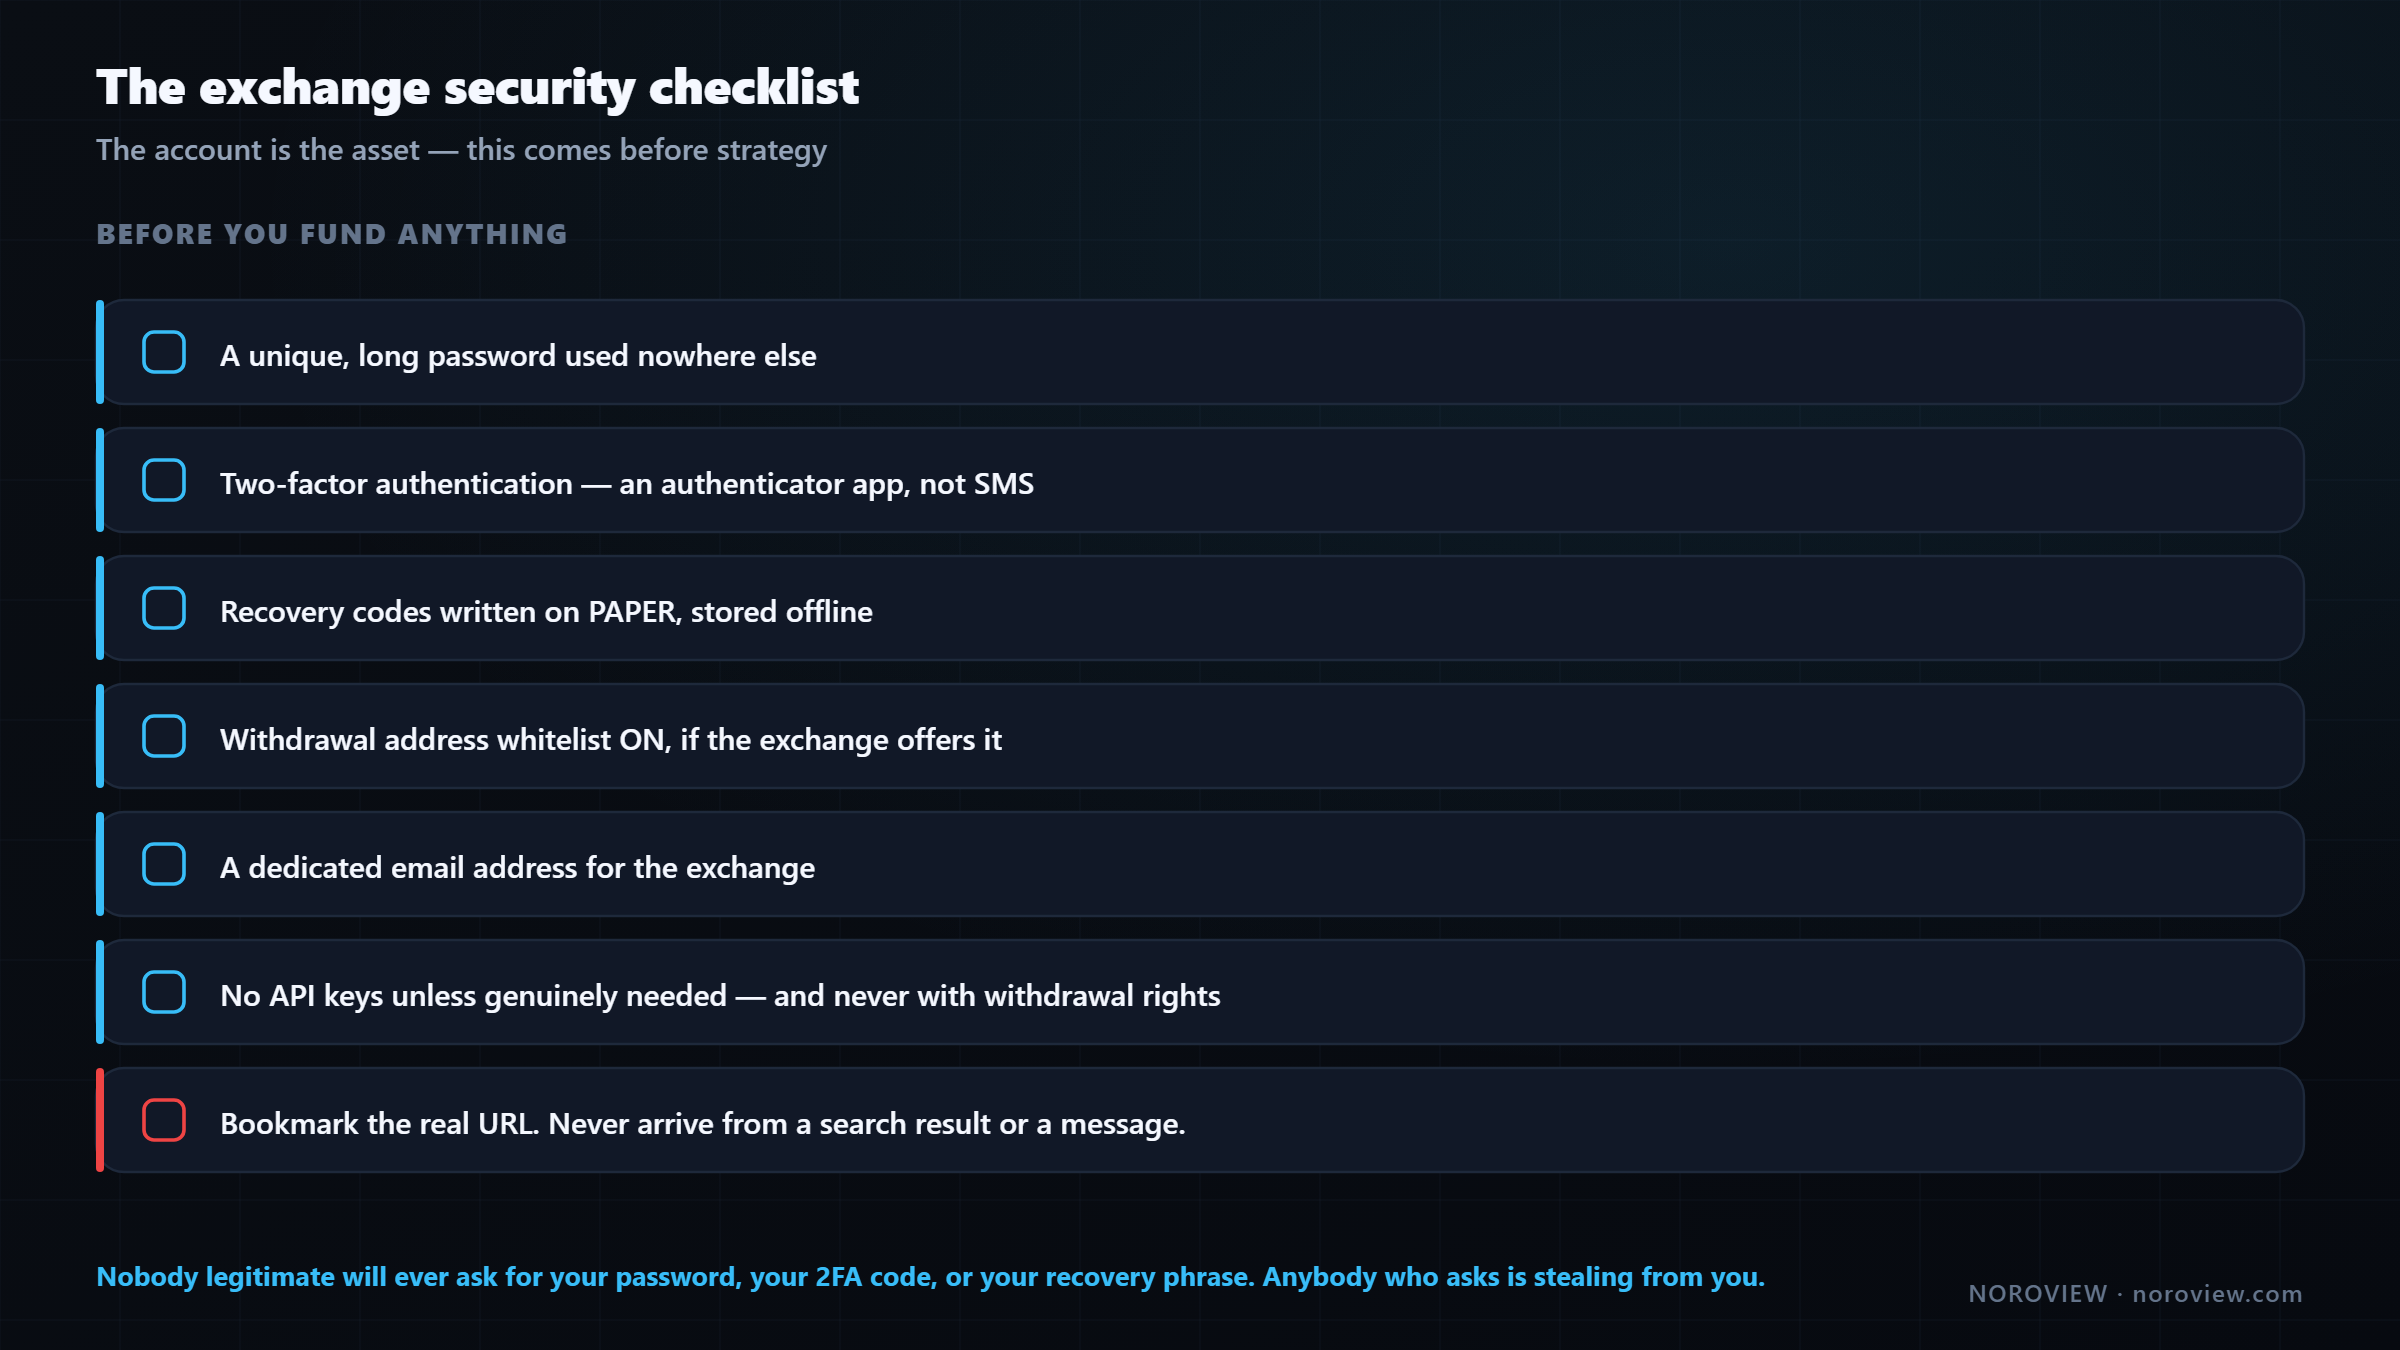
BEFORE YOU FUND ANYTHING

  ☐ A unique, long password used nowhere else
  ☐ Two-factor authentication — an authenticator app, not SMS
  ☐ Recovery codes written on PAPER, stored offline
  ☐ Withdrawal address whitelist ON, if the exchange offers it
  ☐ A dedicated email address for the exchange
  ☐ No API keys unless you genuinely need them — and never with withdrawal rights
  ☐ Bookmark the real URL. Never arrive from a search result or a message.
Two-factor authentication with an authenticator app, not SMS. SIM swapping is a real and common attack: somebody persuades a phone company to move your number to their device, and your SMS codes go to them. CISA's guidance on MFA says the same thing for the same reason.
Recovery codes on paper, offline. Not in a screenshot, not in email, not in a notes app.
Withdrawal whitelisting where offered, so funds can only ever go to addresses you pre-approved. Somebody gets into your account and still cannot send money anywhere new.
A dedicated email address for the exchange. It reduces phishing enormously, because a message arriving at any other address of yours is obviously fake.
And the one that actually catches people:
Bookmark the real URL. Never arrive from a search result or a link.
Fake exchange sites buy advertising slots on search engines and look identical. Bookmark the real address once and use only that bookmark, forever. Get an email with a link? Do not click it. Go to your bookmark.
Nobody legitimate will ever ask for your password, your 2FA code, or your recovery phrase. Not support, not a "team member" in a chat, not somebody helping you in a comment section. Anybody who asks is stealing from you, and there has never been an exception.
Finally, restating lesson 14 because it belongs here: do not keep all your capital on the exchange. Working capital there, the rest elsewhere. Exchange risk is real and has nothing to do with how well you trade.
Spot vs perpetual futures
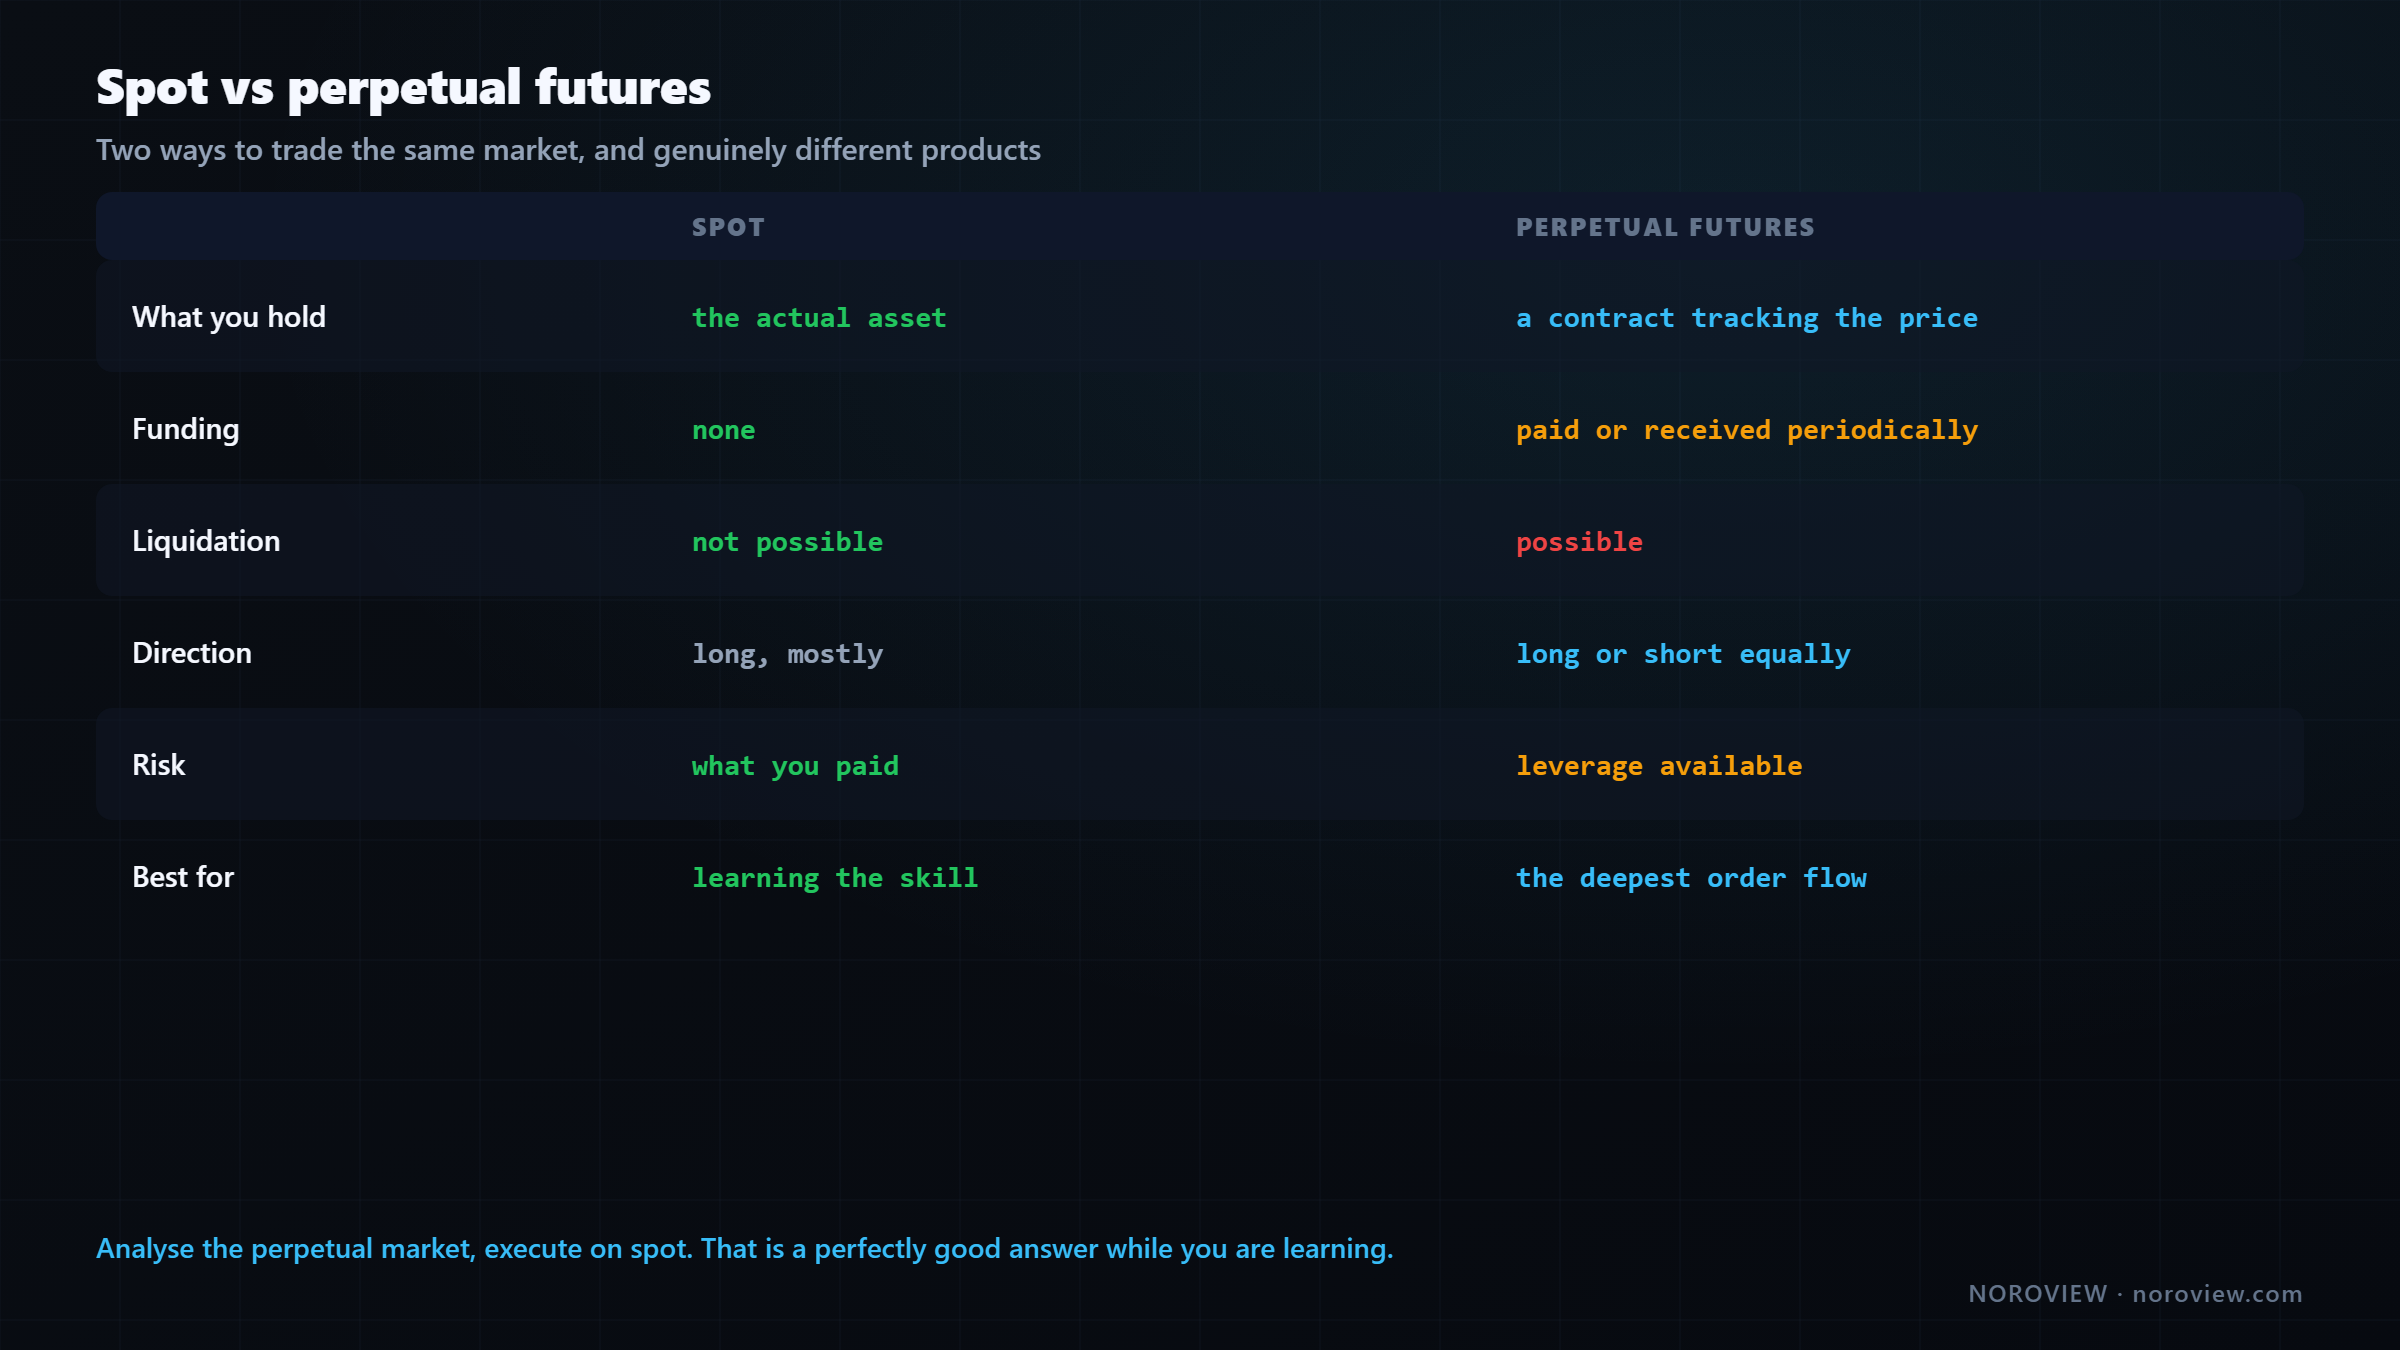
| Spot | Perpetual futures | |
|---|---|---|
| What you hold | The actual asset | A contract tracking the price |
| Funding | None | Paid or received periodically |
| Liquidation | Not possible | Possible |
| Direction | Long, mostly | Long or short equally |
| Risk | What you paid | Leverage available |
Spot is buying the actual thing. If it halves, you own the same asset at a lower price. There is no liquidation because there is nothing to liquidate — you paid in full.
Perpetual futures are a contract that tracks the price. You never own the asset, you can go long or short equally easily, leverage is available, and there is a funding rate — a periodic payment between longs and shorts that keeps the contract tethered to spot.
Two things about funding matter practically.
Funding is a cost of holding. Small per period, and it adds up.
For a scalper holding minutes, irrelevant. For somebody holding for days, it is a real cost that belongs in the calculation.
Extreme funding tells you the crowd is heavily one-sided.
When funding goes strongly positive, longs are paying shorts — which means the market is crowded with leveraged longs. Crowded trades are exactly where liquidation cascades come from, which is why funding extremes often mark local turning points. Not a signal on its own. Context.
Which should you use?
If you're new: spot. If you must use derivatives: the smallest leverage available.
Spot has no liquidation risk, no funding and no leverage — one fewer way to be destroyed while you are learning the actual skill.
The honest counter-argument is that everything in this course is built on order flow, and the deepest, most liquid order flow in crypto lives in the perpetual futures markets. That is true. But you can analyse the perpetual market and execute on spot, which is exactly the lesson 2 workflow and a perfectly good answer while learning.
⚠️ What is available to you depends on where you live. Derivatives, leverage limits, and sometimes the platform itself are restricted in many jurisdictions. Nobody in a comment section can tell you what you have access to. Check on the exchange, for your own country, before you plan anything around it.
Leverage and liquidation
Leverage is the most misunderstood thing in retail crypto.
Leverage does not increase your risk. Position SIZE increases your risk.
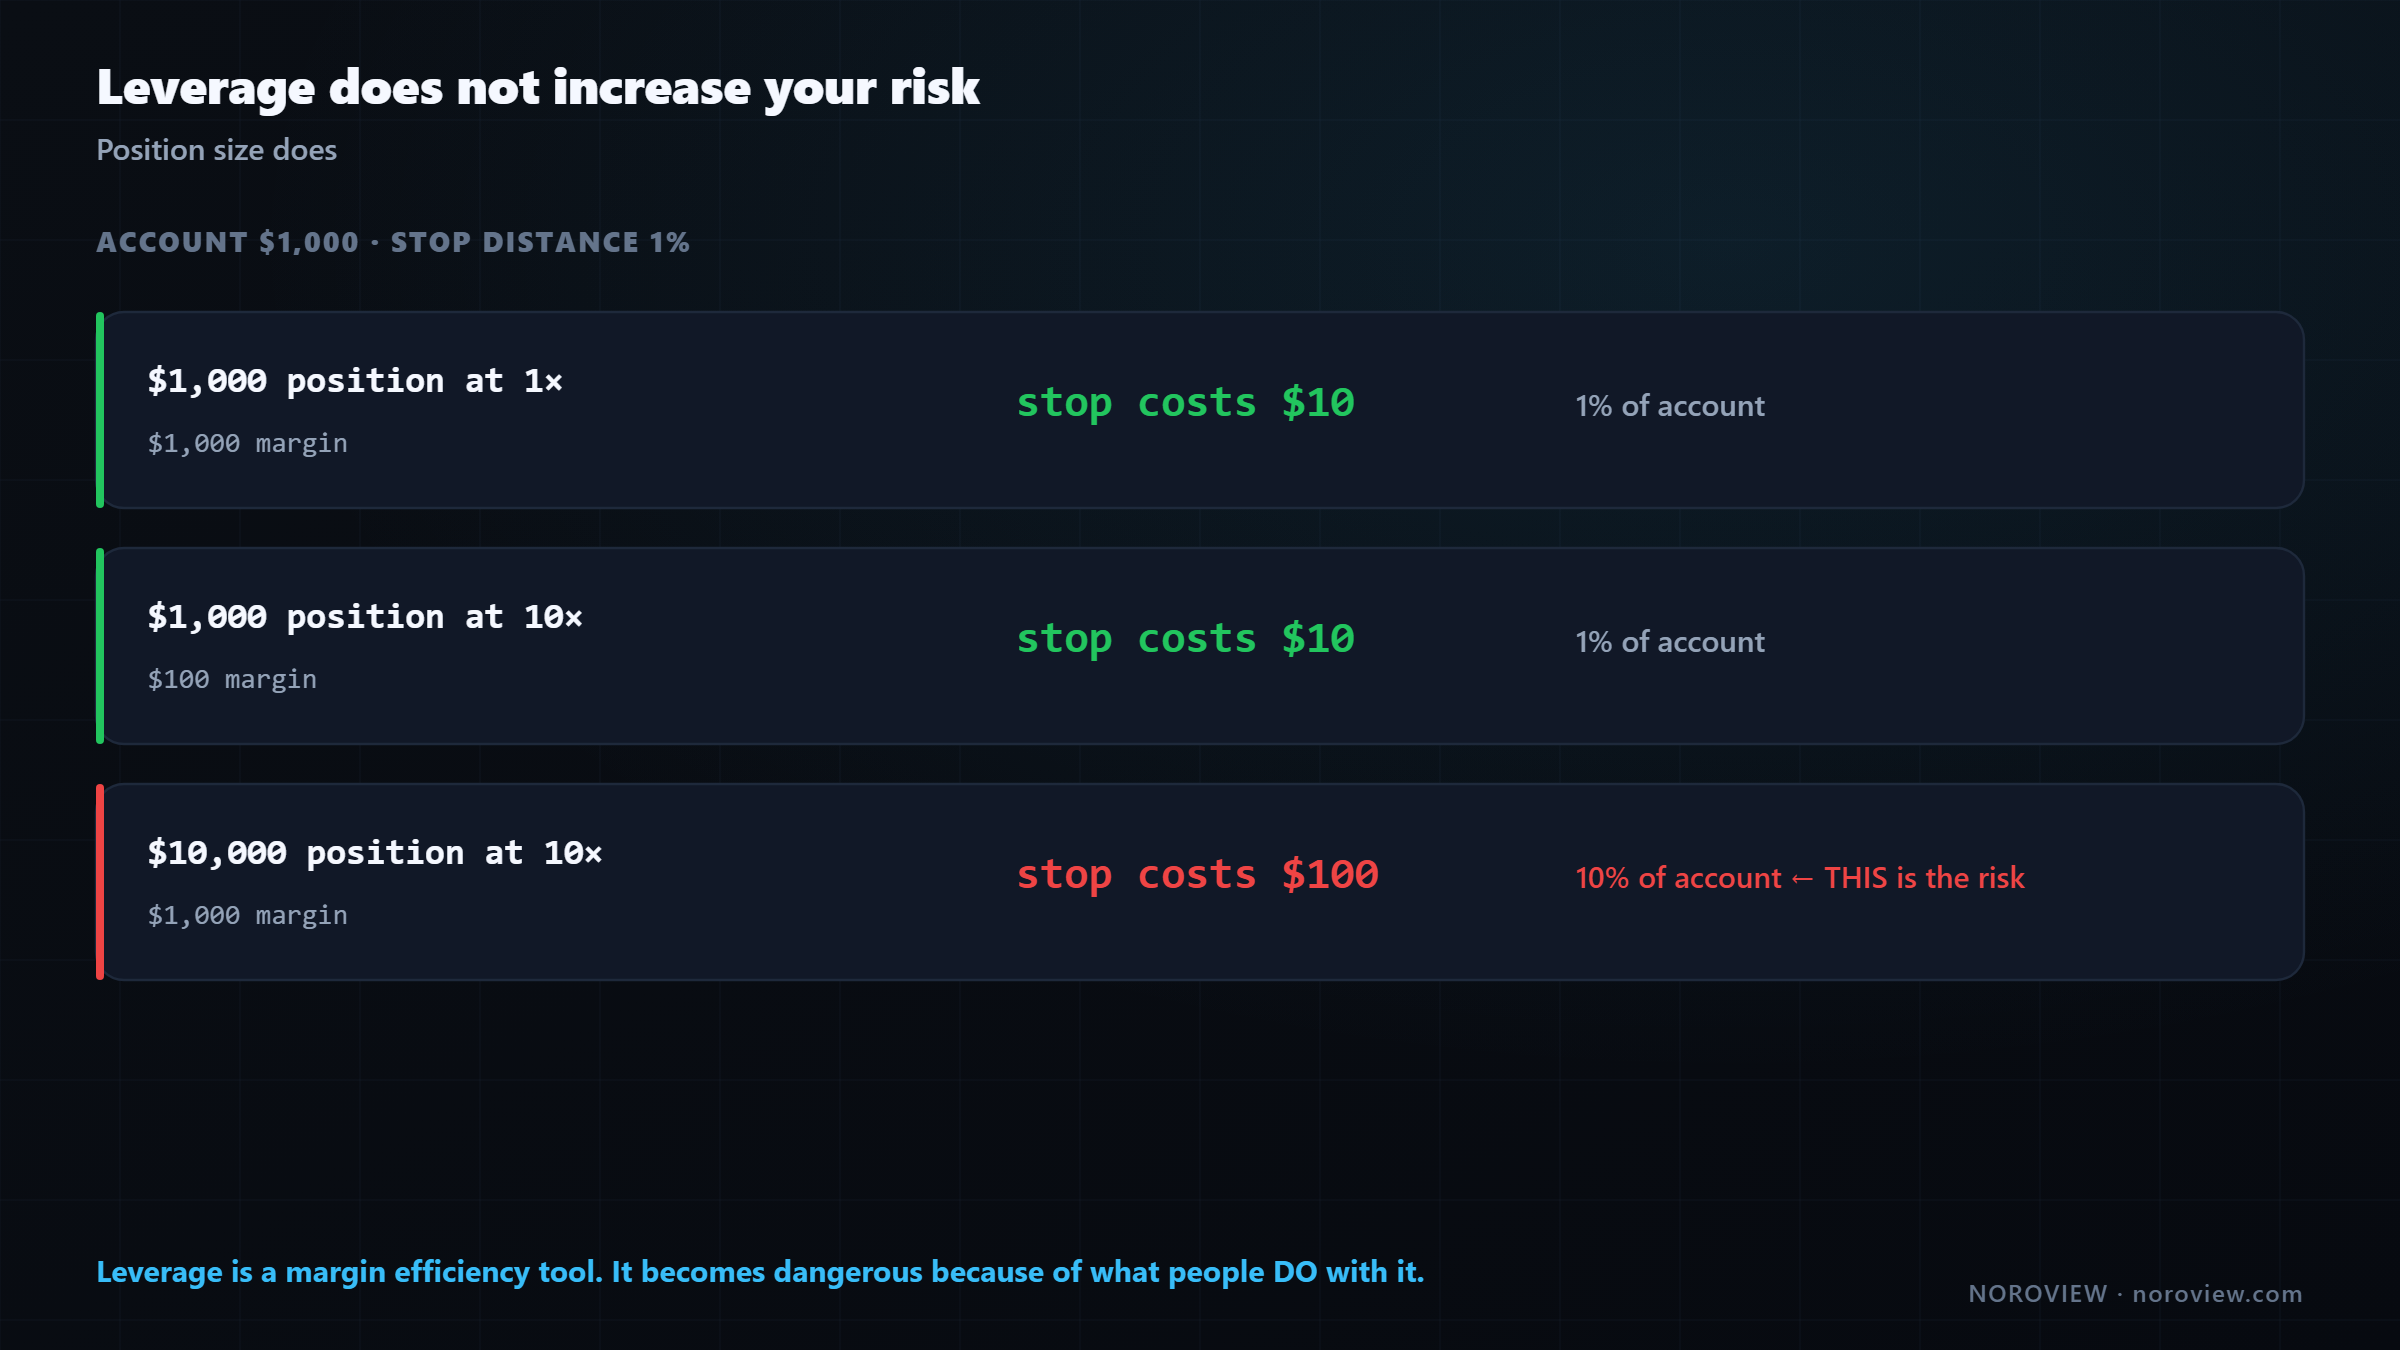
Account: $1,000 · Stop distance: 1%

  Position $1,000  at 1×   → stop costs $10  (1% of account)
  Position $1,000  at 10×  → stop costs $10  (1% of account)
                              ...uses $100 margin instead of $1,000

  Position $10,000 at 10×  → stop costs $100 (10% of account)  ← THIS is the risk
Look carefully. The first two rows have the same position size and therefore the same loss if the stop is hit. The only difference is how much margin is tied up. The risk changed in the third row — not because leverage went up, but because the position got ten times bigger.
Leverage is a margin efficiency tool. It becomes dangerous because of what people DO with it.
The exchange offers 20×, so people take a 20×-bigger position — and now a normal 1% move against them costs 20% of their account.
The one way leverage genuinely adds risk
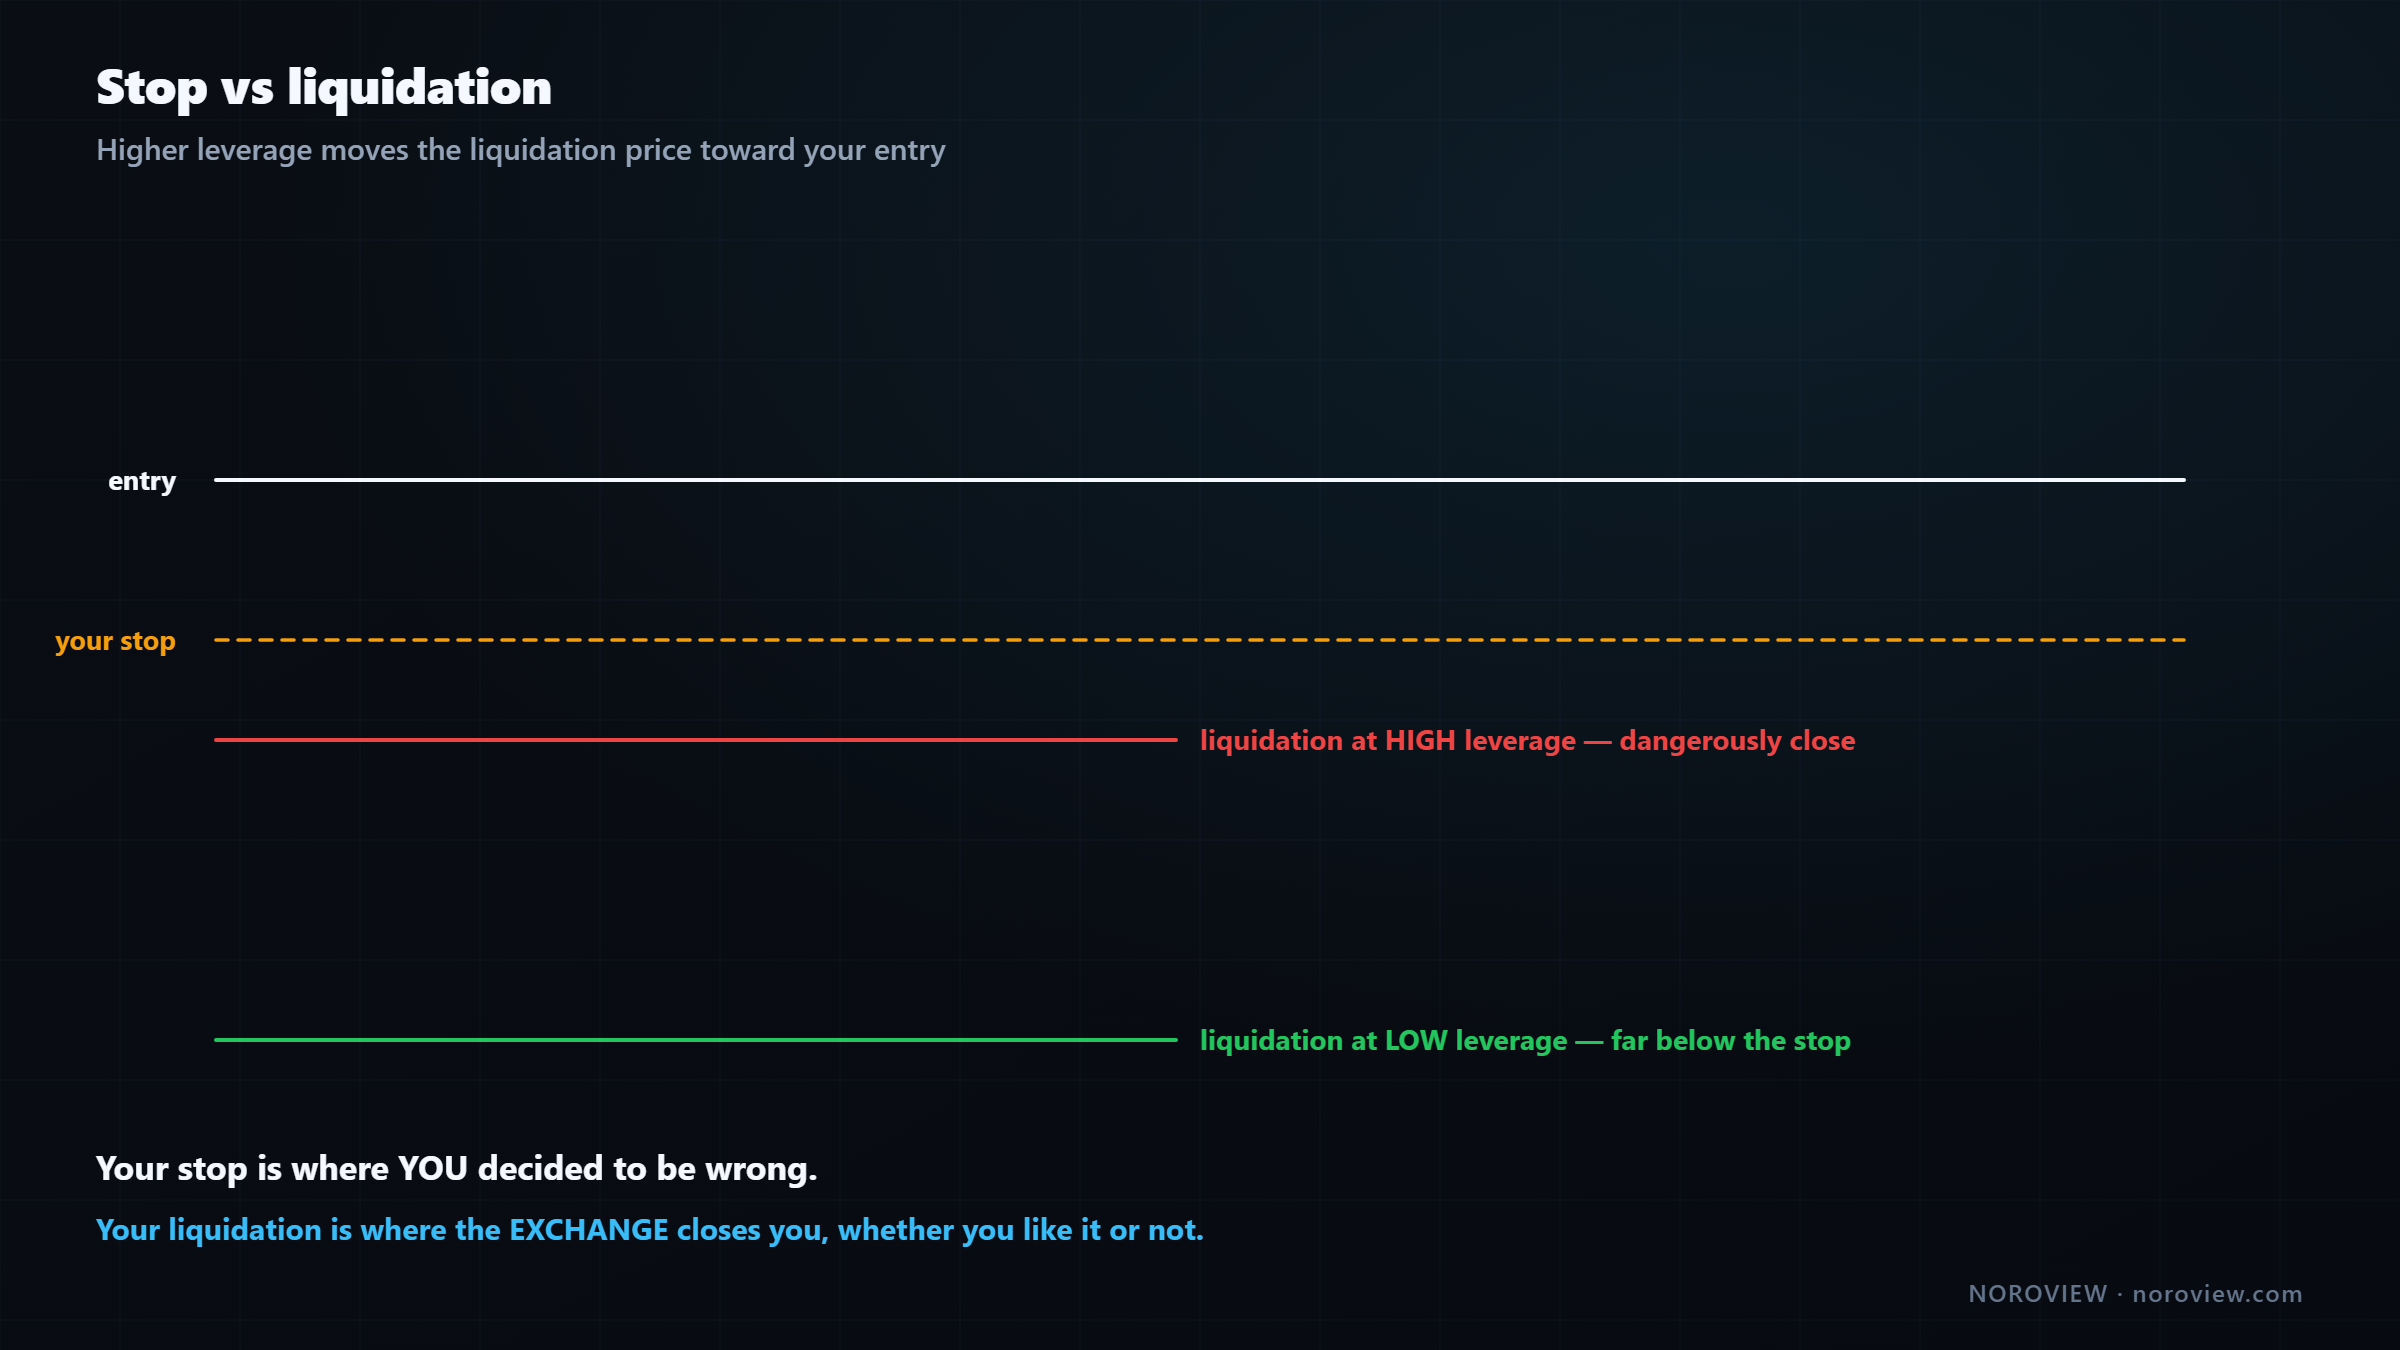
Your stop is where YOU decided to be wrong. Your liquidation is where the EXCHANGE closes you, whether you like it or not. Higher leverage → liquidation sits CLOSER to your entry.
When you use leverage the exchange has lent you exposure and it protects itself. If your position moves far enough against you that your margin is nearly gone, it closes your position for you — and you usually lose the entire margin on that position.
Your stop must ALWAYS be far closer than your liquidation. Not slightly. Far.
If your stop and your liquidation price are anywhere near each other, you have built a machine that will eventually take your entire margin on a normal wick — because in a fast move a stop can fill worse than expected, and liquidation is not gentle.
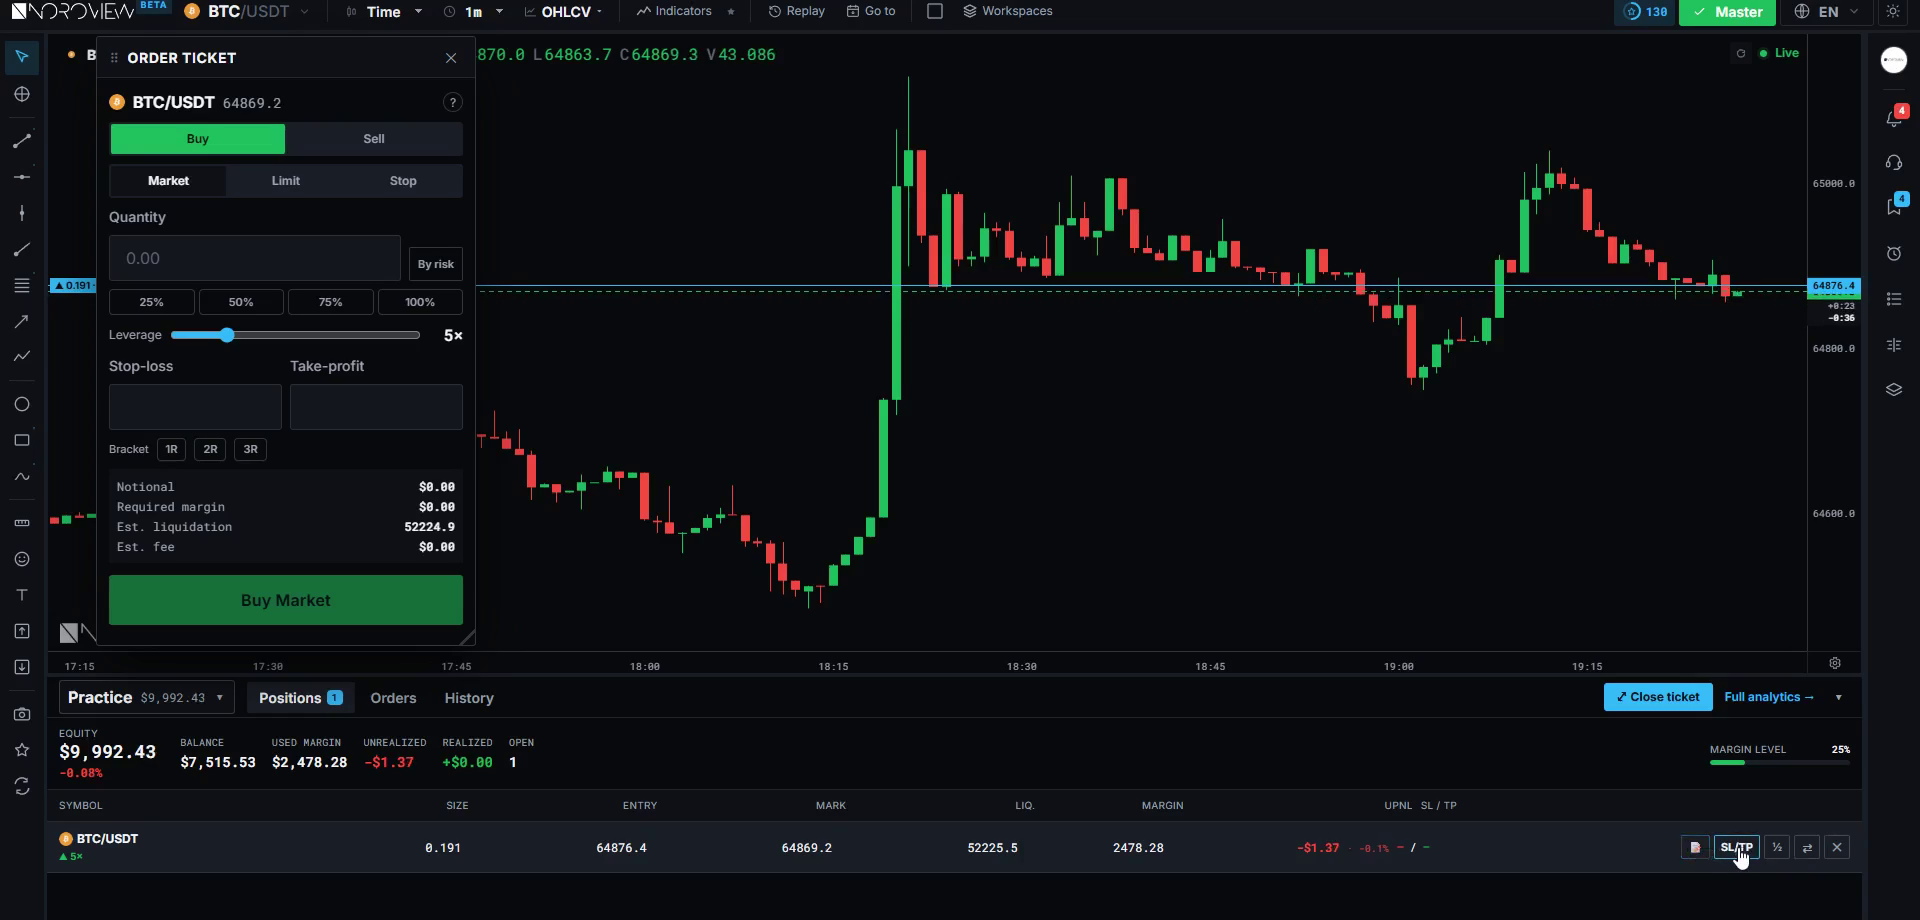
Check the estimated liquidation price before every leveraged trade. It is shown in the order preview. Close to your stop? Reduce leverage until it is not.
Liquidation cascades
When liquidations trigger, they become forced market orders — which trigger more.
When many leveraged positions liquidate at once, those liquidations become forced market orders into the book. Those push price further, which liquidates more positions, which pushes price further. That is how you get a violent thousand-dollar move in ninety seconds with no news.
And you already know from lesson 3 exactly why it travels so far: the book is thin during those moments, because market makers pull their quotes when they do not know what is happening. Forced aggression into an empty book equals an enormous move.
My advice: if you use leverage at all, use the smallest amount that lets you take the position size your risk rules already allow. Leverage should be the output of your sizing, exactly like position size was — never the input.
▶ Try this now
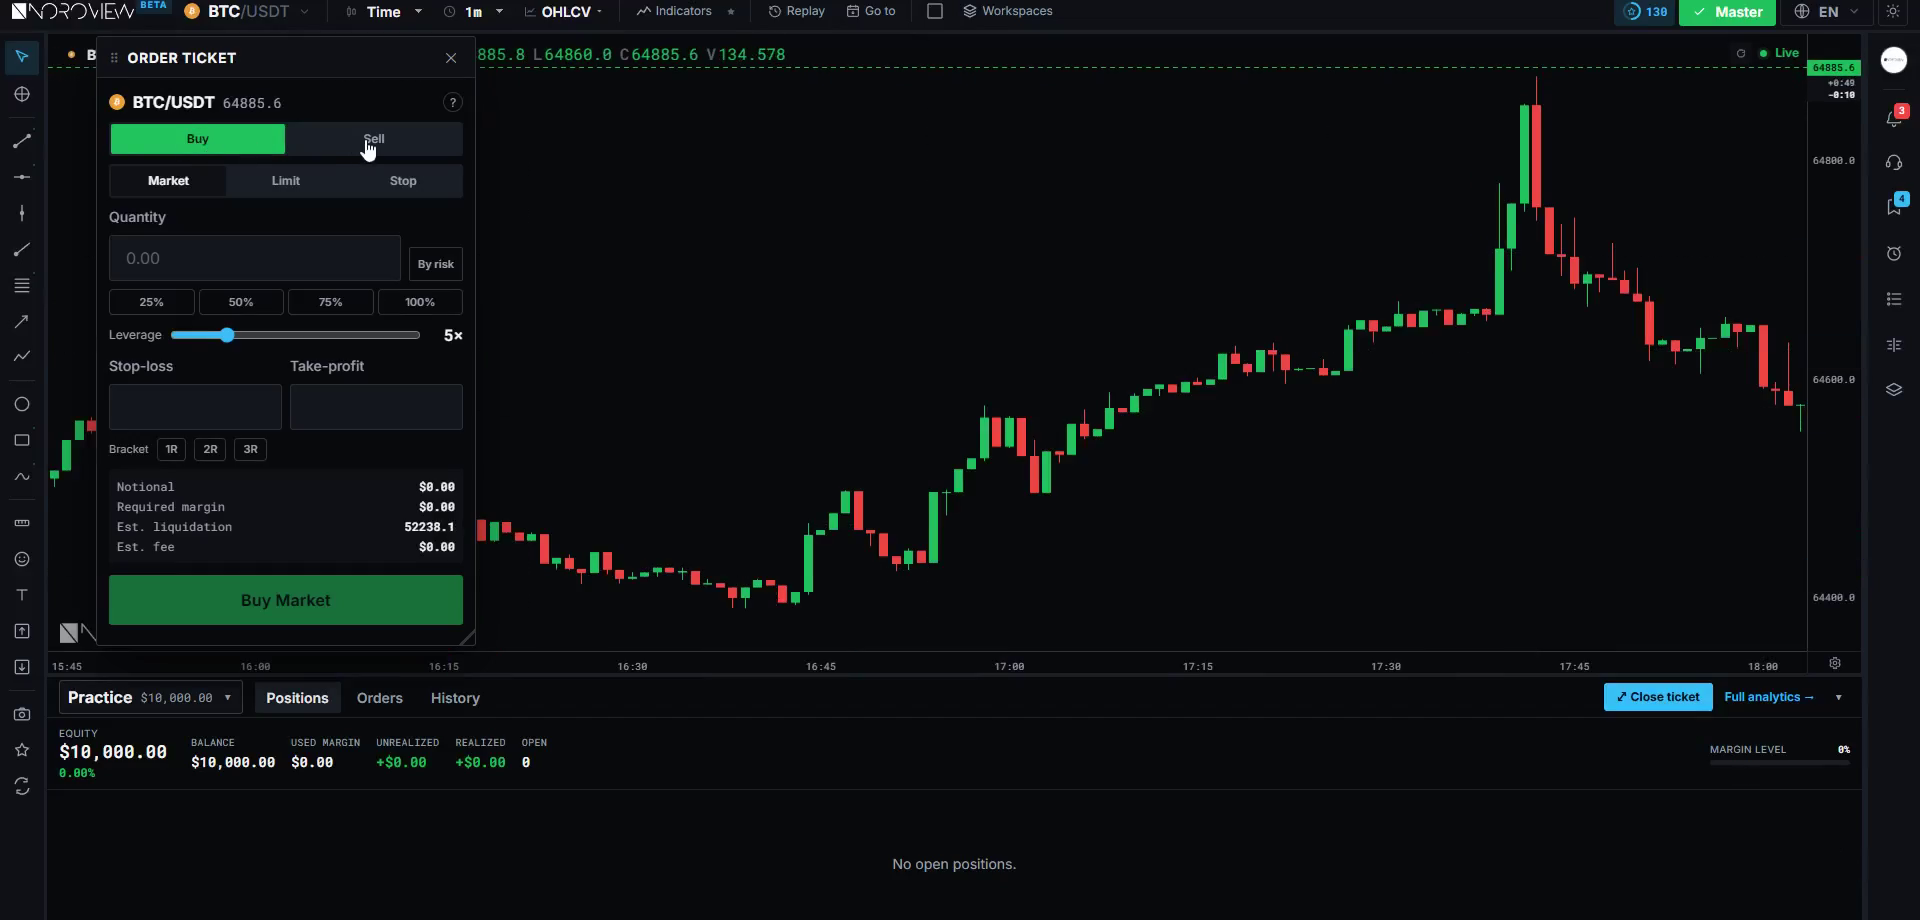
In the paper-trading order ticket, set a 1% risk with a stop, then drag the leverage slider from 2× to 20× without changing anything else. Watch the estimated liquidation price march toward your entry while the amount at risk stays identical. That is the entire lesson, visible in ten seconds. Launch NOROVIEW free →
Every order type you need
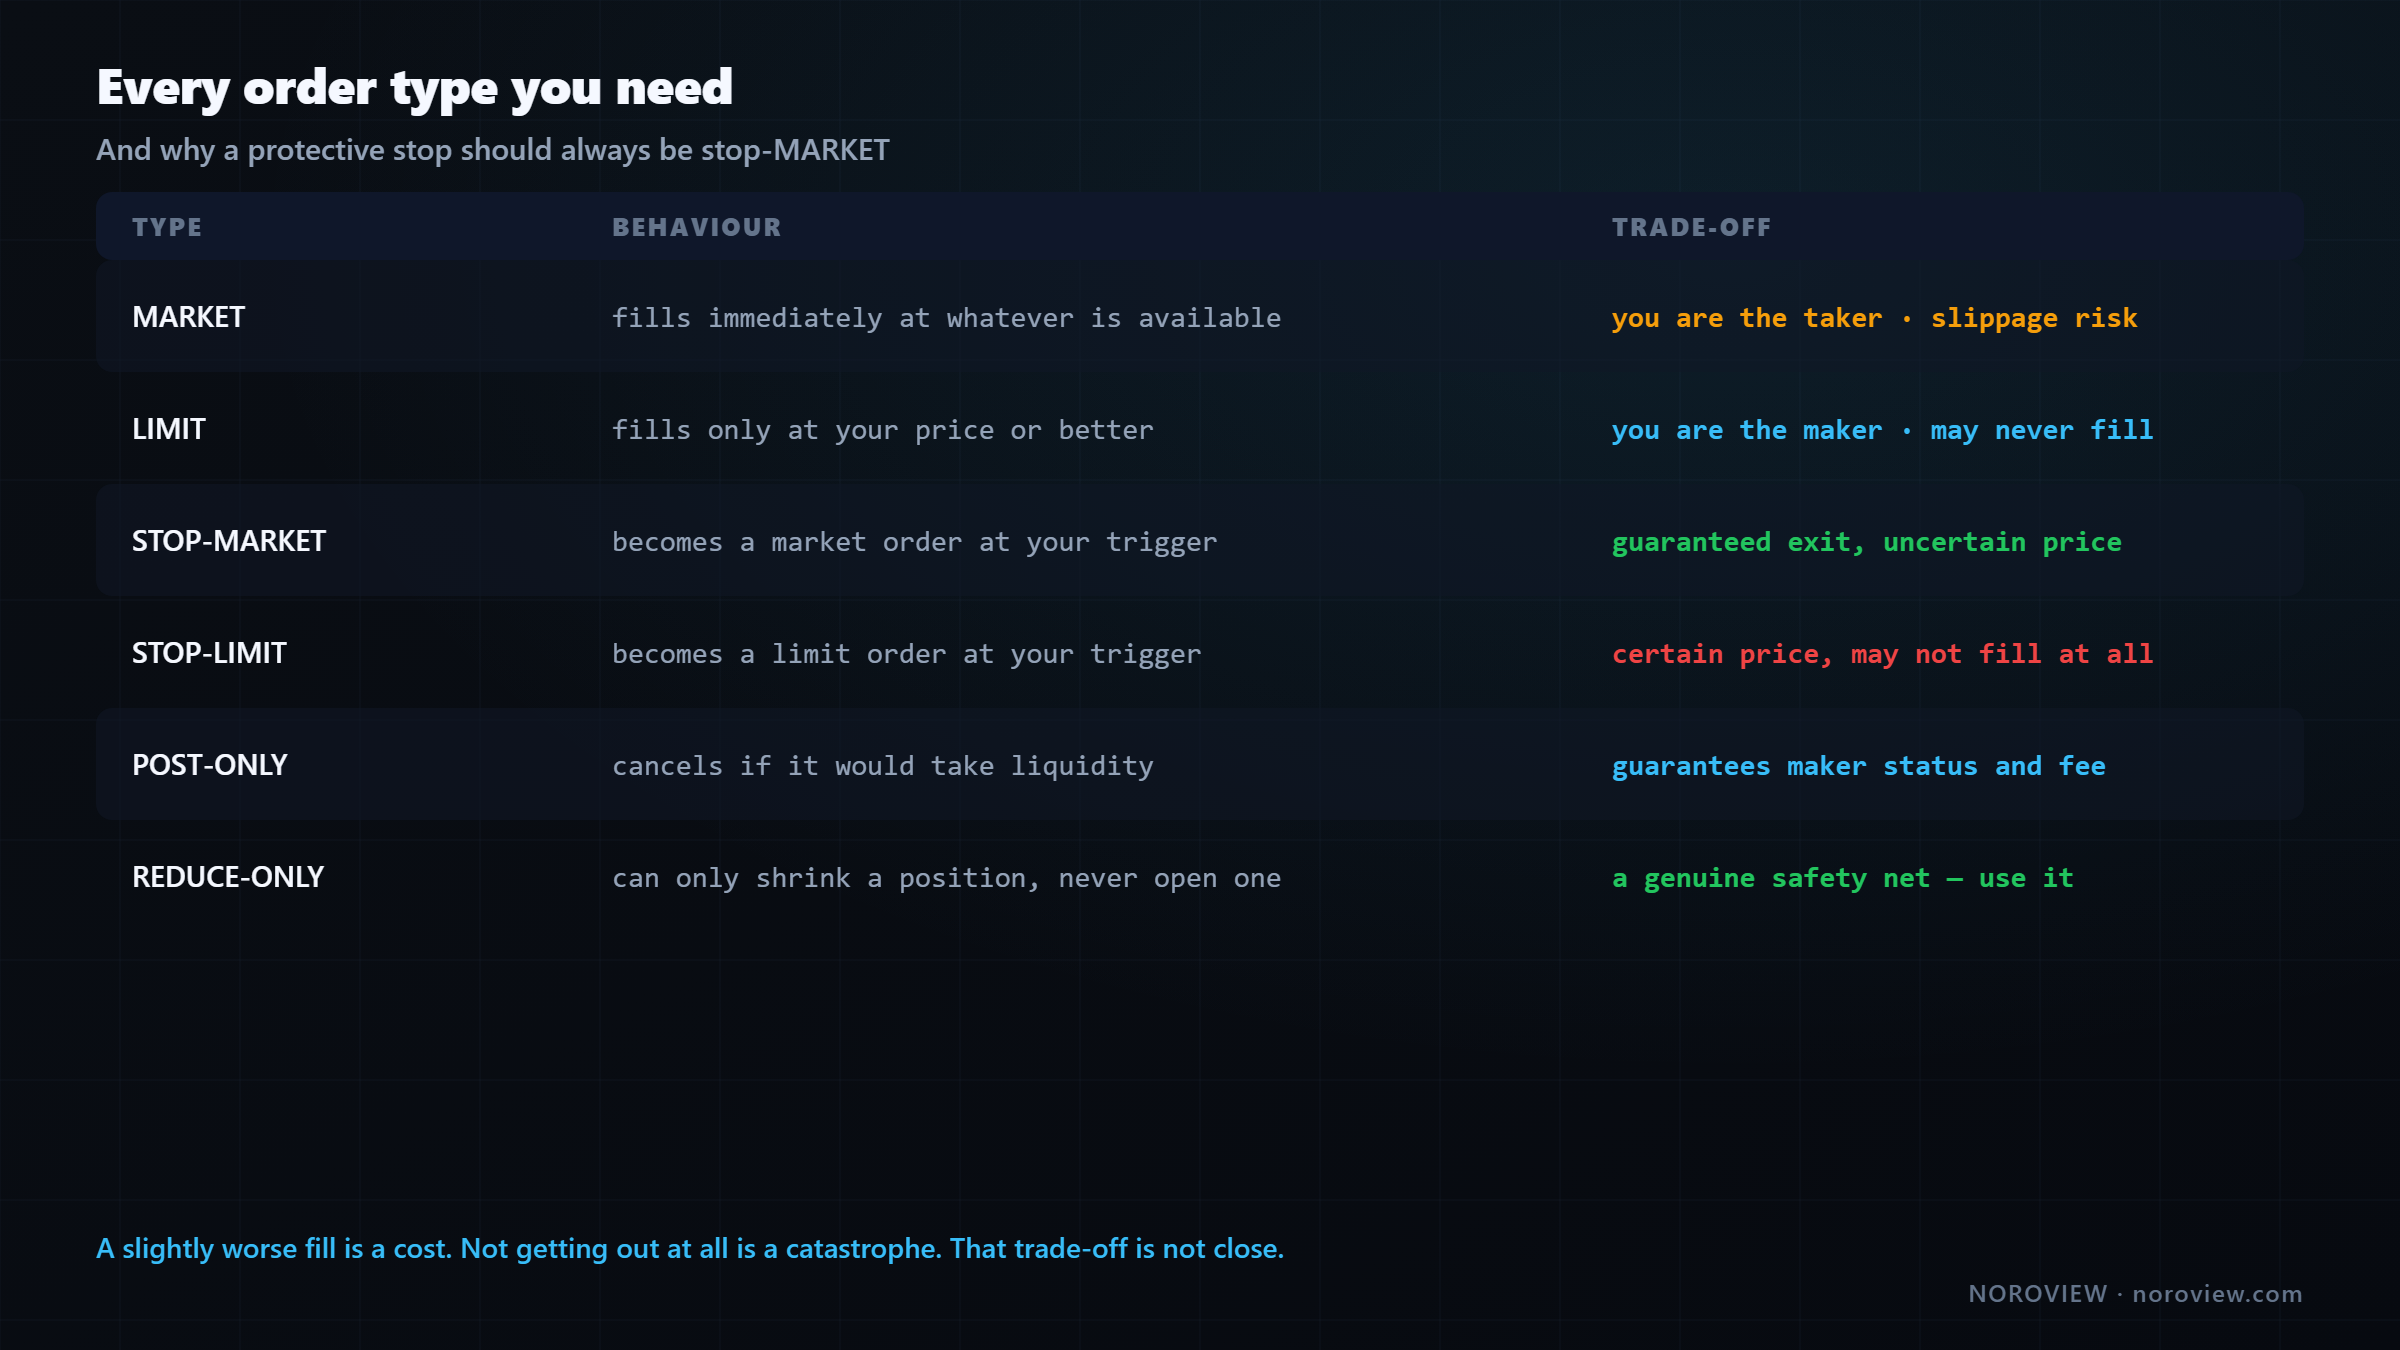
| Type | Behaviour |
|---|---|
| Market | Fills immediately at whatever is available · you are the taker · slippage risk |
| Limit | Fills only at your price or better · you are the maker · may never fill |
| Stop-market | Becomes a market order at your trigger · guaranteed exit, uncertain price |
| Stop-limit | Becomes a limit order at your trigger · certain price, may not fill at all |
| Post-only | Cancels if it would take liquidity · guarantees maker status |
| Reduce-only | Can only shrink a position, never open one · a genuine safety net |
Market takes whatever is there right now. You are the aggressive side — you cross the spread and pay for immediacy, and in a fast or thin market you can be filled meaningfully worse than the price you saw.
Limit is passive. You join the queue and get your price or better, or you do not trade. In this model that is usually how you enter, because our entries are at levels and we are not chasing.
The stop distinction that genuinely matters
Stop-MARKET: you will get out. You don't know at what price. Stop-LIMIT: you know the price. You might not get out at all.
A stop-limit order becomes a limit order when triggered. You control the price — and if price gaps straight past it, you do not get filled and you are still in the trade, with a position now much further underwater than you planned.
For a protective stop, use stop-market. Every time.
A slightly worse fill is a cost. Not getting out at all is a catastrophe.
Being filled a bit worse than intended is an annoyance you can budget for. Not being filled at all, in a crash, is the thing that ends accounts. That trade-off is not close. (CME's order types course covers the same mechanics in regulated futures.)
Post-only cancels the order if it would take liquidity, which guarantees maker status and the maker fee. Useful when entering passively at a level and fees matter — which, on a small account, they very much do.
Reduce-only is a genuine safety feature: the order can only make a position smaller, never open a new one. Put reduce-only on your take-profit and stop orders. A double-click, a stale order or a fat finger can then never accidentally open a fresh position in the opposite direction. It costs nothing and removes a whole category of expensive accidents.
Fees, and why they matter most at $100
I will not quote numbers — they change, and every exchange publishes a current tiered schedule. But the structure changes how you should trade a small account.
MAKER fee — you added liquidity (a limit order that rested). Lower. TAKER fee — you removed liquidity (a market order). Higher.
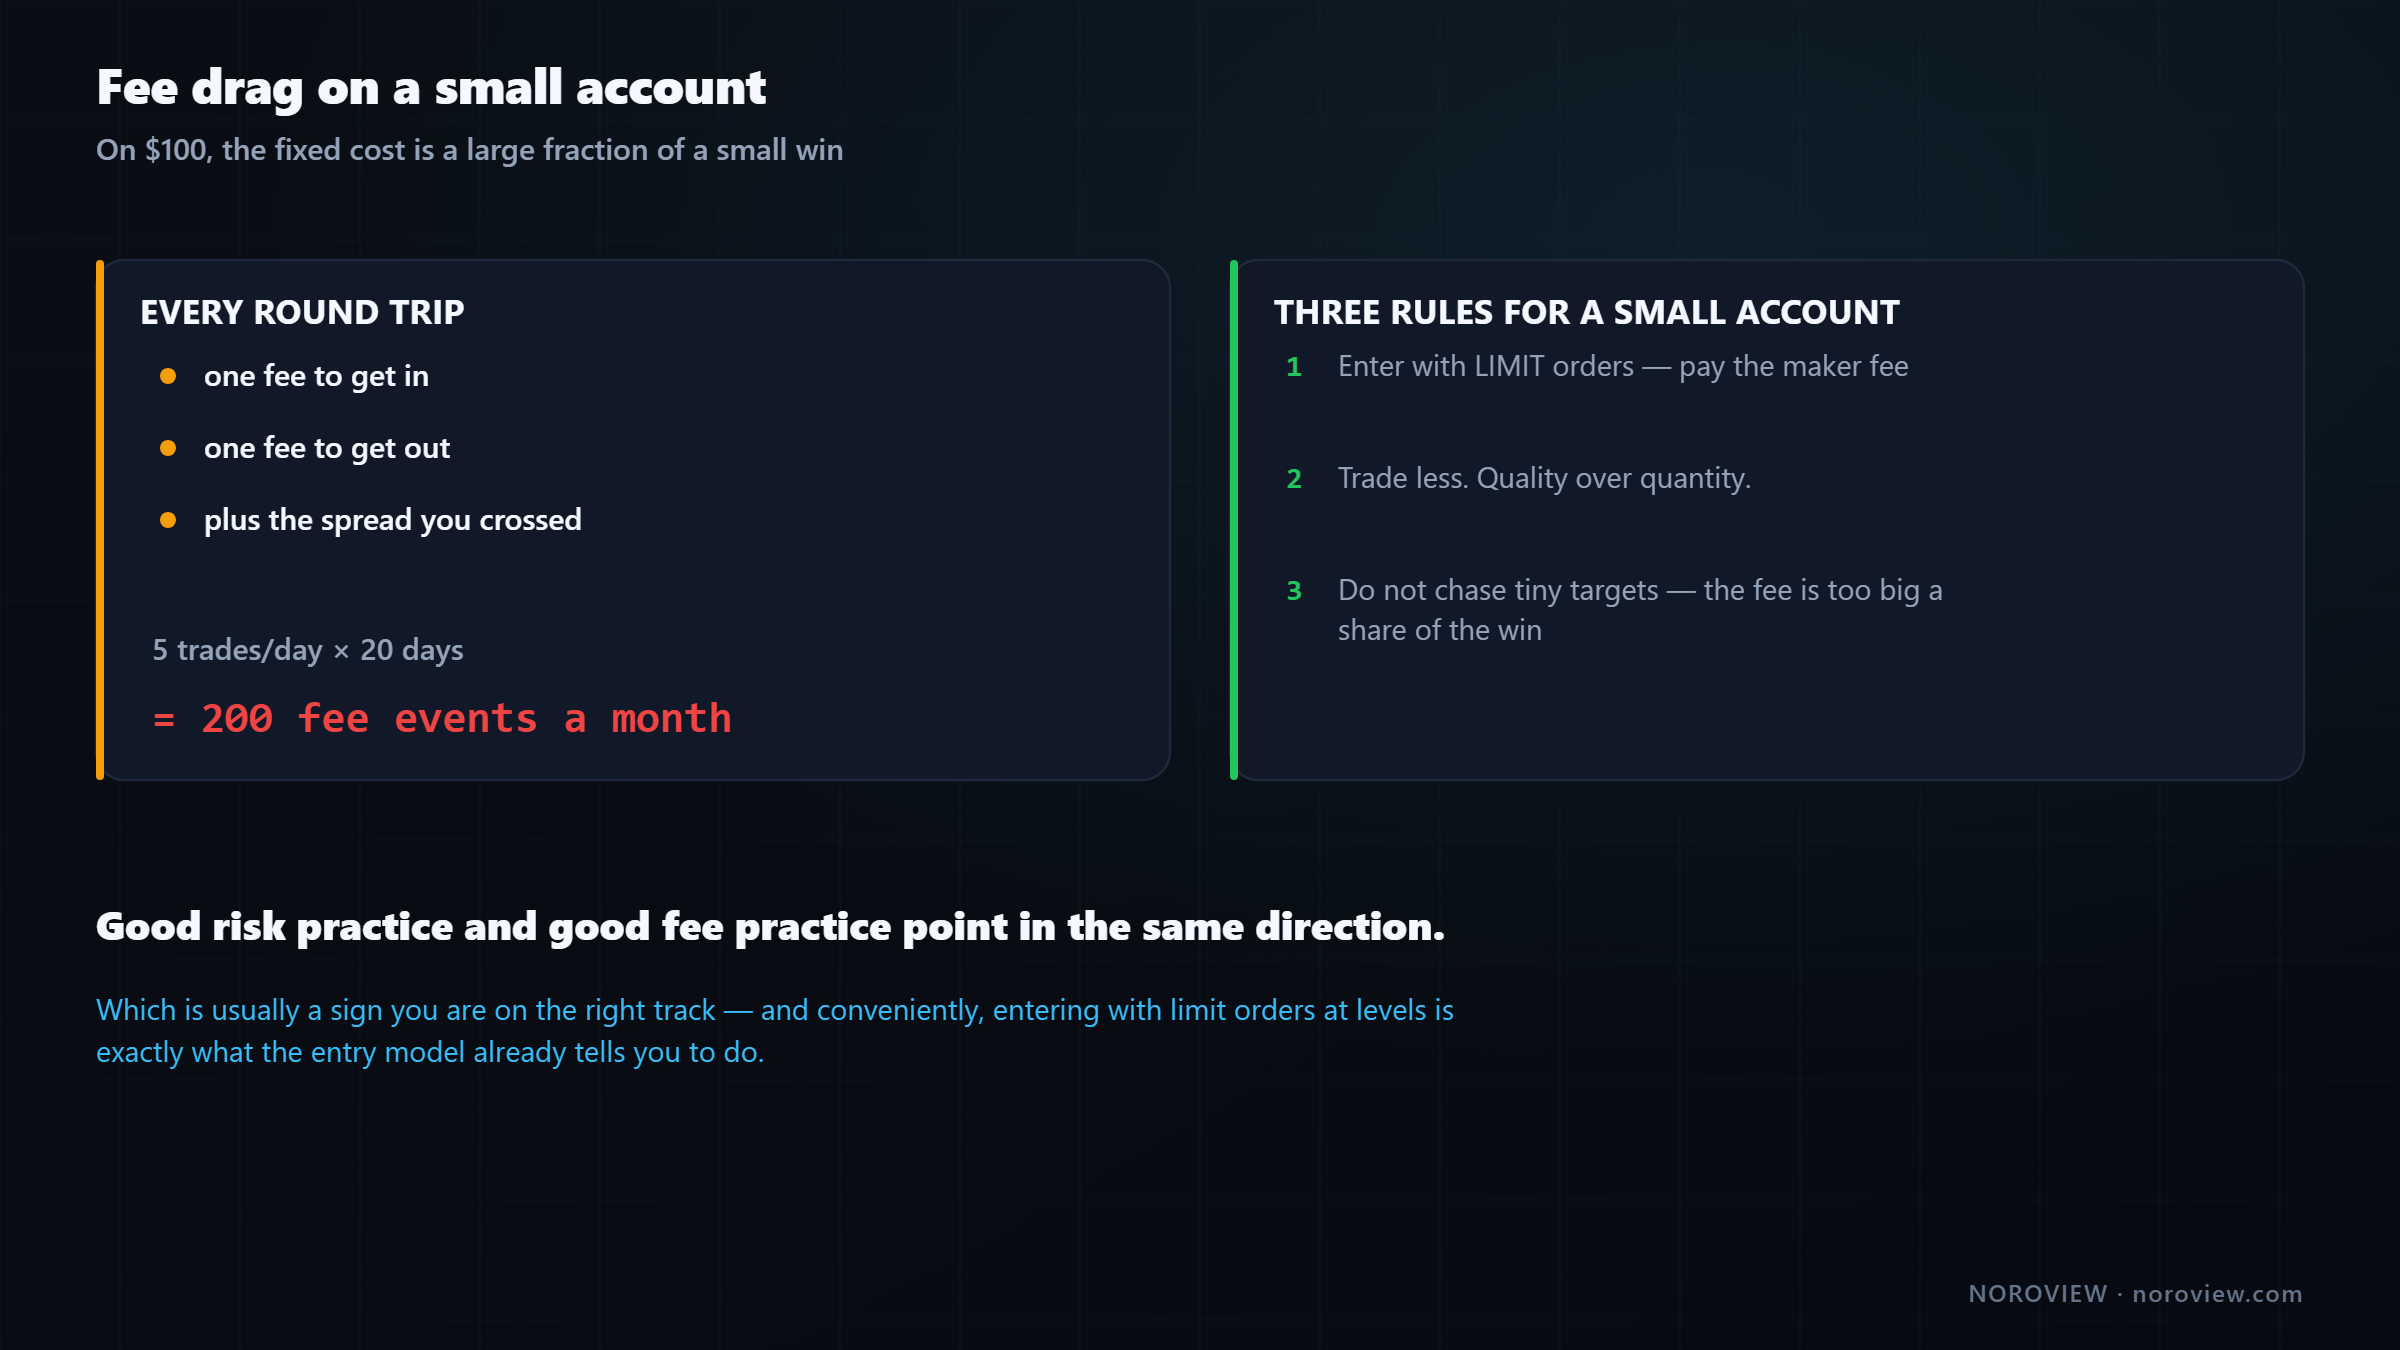
Every trade costs you twice — once to get in, once to get out — plus the spread you crossed. On a large account with a meaningful target that is noise. On a $100 account where you are aiming for small absolute gains, the fees are a real share of your result. Trade five times a day, twenty days a month, and you generate 200 fee events.
Three rules for a small account:
- Enter with limit orders wherever the model allows — and it usually does, because you enter at levels, and levels are places you can wait at.
- Trade less. Over-trading costs you twice on a small account: bad decisions and fee drag.
- Do not chase tiny targets. If your target is small enough that the round-trip cost is a meaningful share of it, you are working for the exchange.
Which, conveniently, is exactly what the entry model already tells you to do. Good risk practice and good fee practice point in the same direction — usually a sign you are on the right track.
Analyse where the data is best. Execute where your account is.
NOROVIEW runs in a browser tab next to your exchange, with server-side order flow, footprint charts and a level map — no download and no data-feed bill. Create a free account → · Compare plans
The two-screen workflow
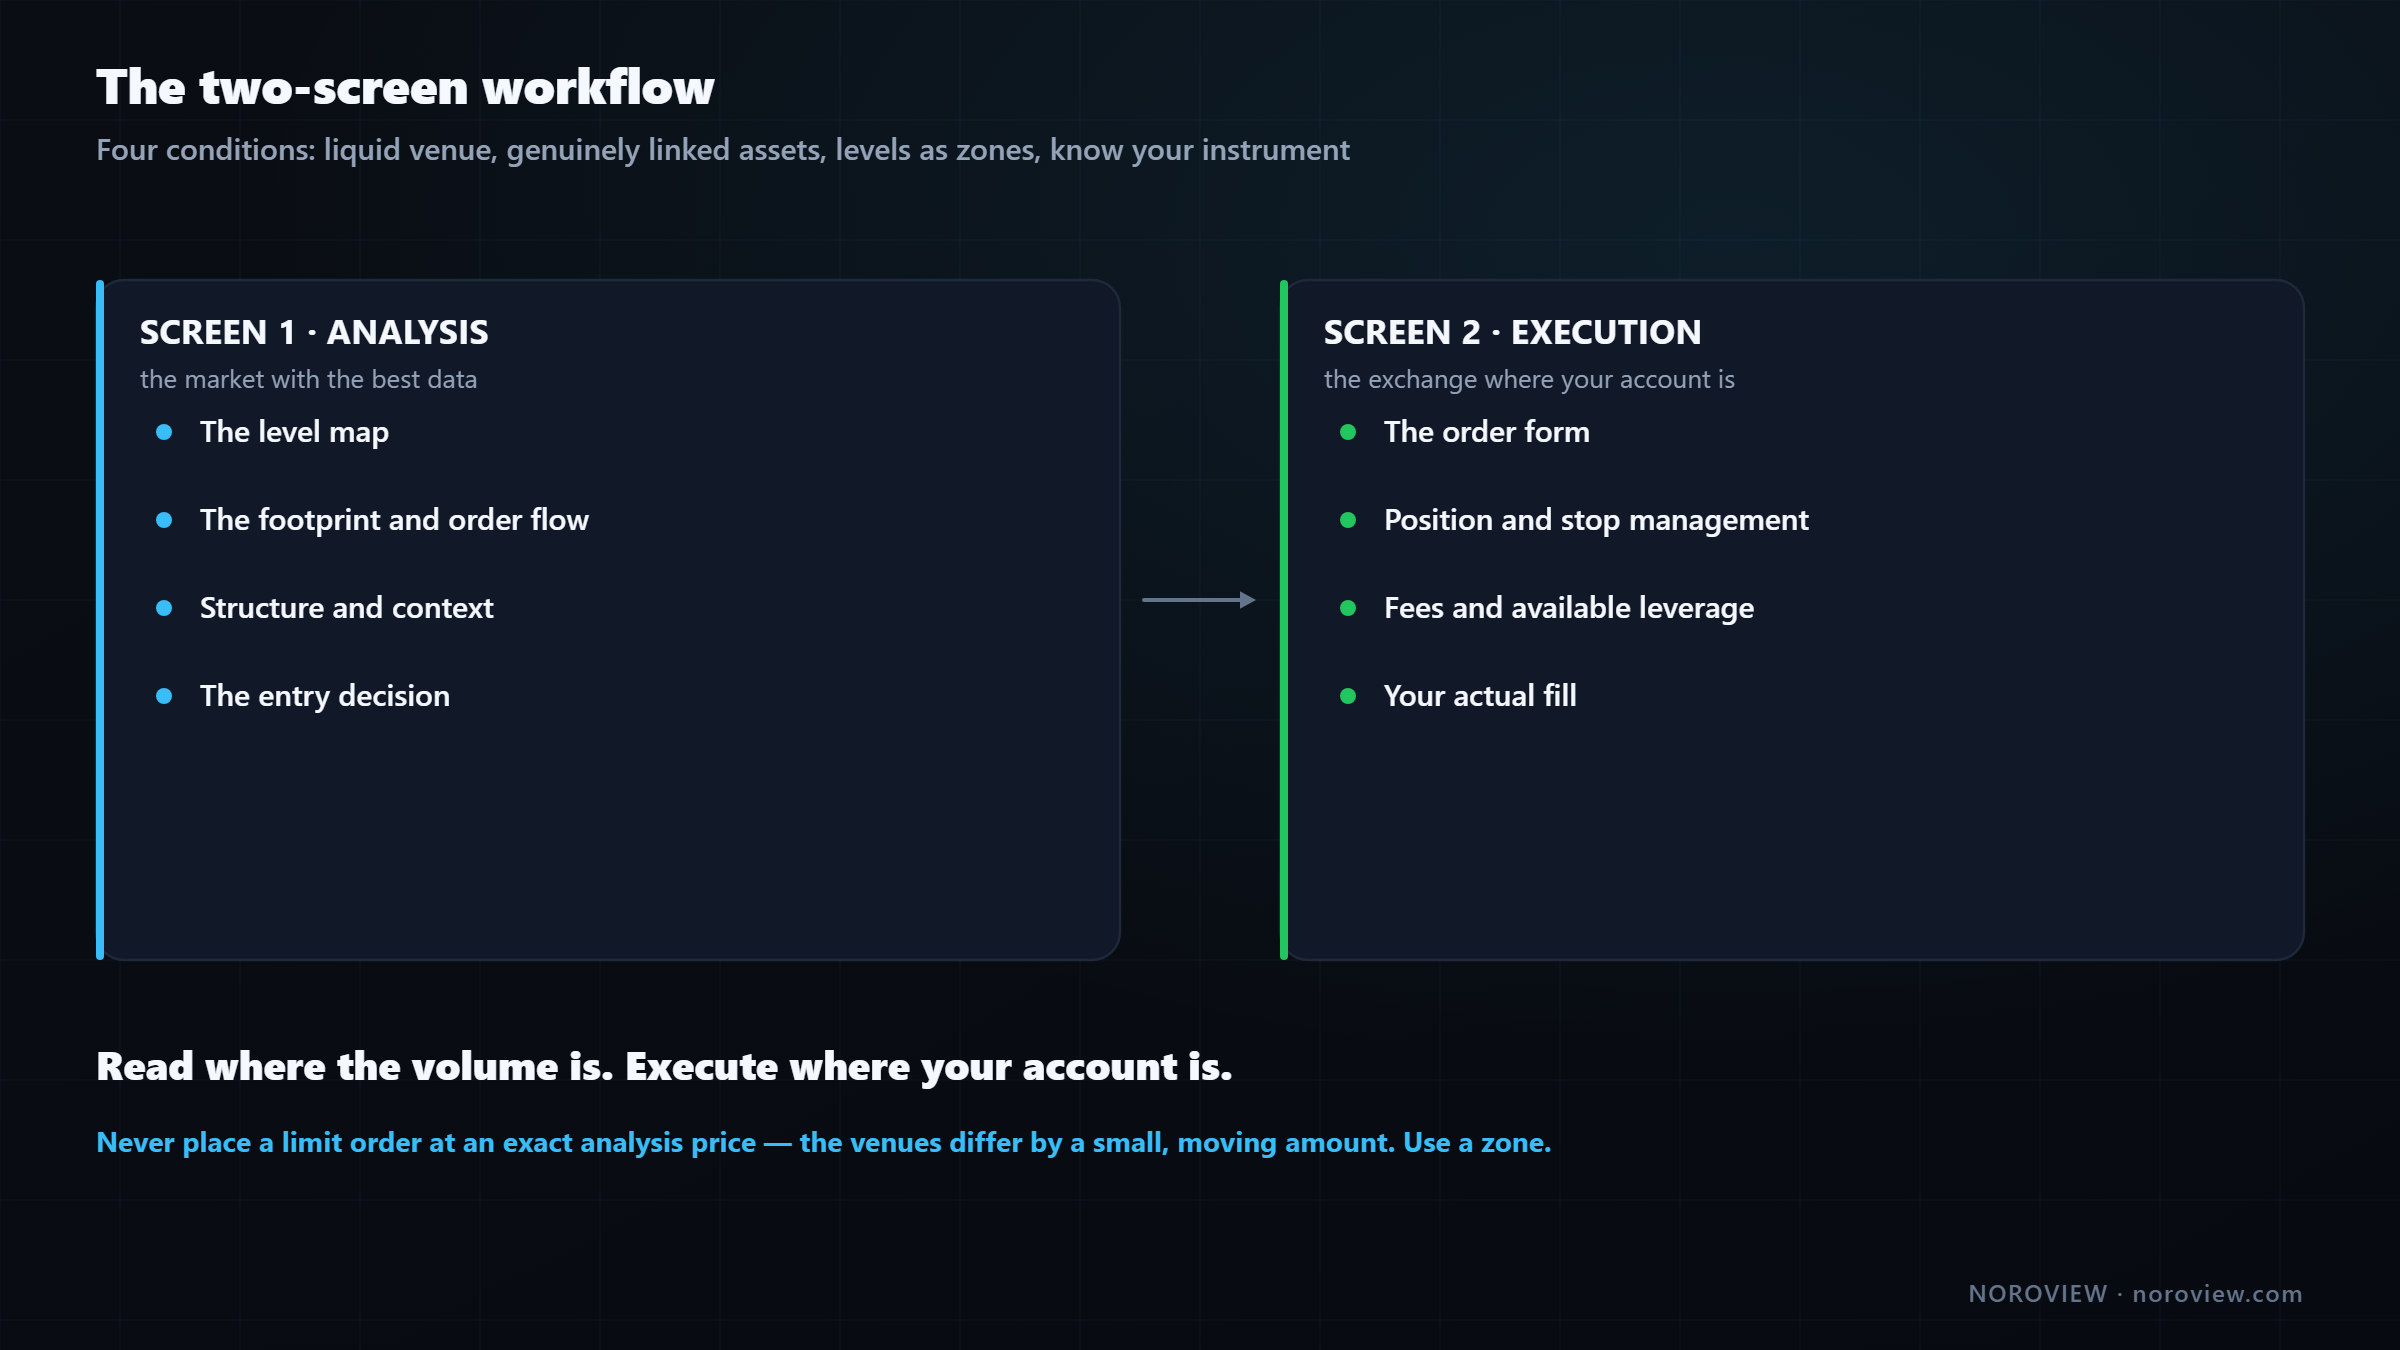
Analysis lives on one screen: the level map, the footprint, the order flow, the entry decision — all on the market with the best data. Execution lives on the other: the exchange, where your account is.
This is the lesson 2 question made practical, and the four conditions are now real rather than theoretical:
- Analyse a liquid venue.
- The two markets must be genuinely linked — majors, not obscure alts.
- Treat levels as zones, because the venues differ by a small amount.
- Know whether you are looking at spot or perpetual futures.
Condition 3 becomes real the first time you do this. Your level from the analysis platform will not be the identical number on your exchange — it will be a few dollars off, and that offset moves around.
Never place a limit order at an exact analysis price. Use a small zone.
Work in a small band, and place your order in the part of it that is on the safe side of your own stop.
A practical habit worth building: before you place the order, glance at the price on both screens. If they have diverged more than usual, something is happening — a fast move, a venue issue, thin liquidity. That is a moment to wait, not to act.
The $100 plan, honestly
Why $100? Not because you can grow it into something. Let me get that out of the way immediately.
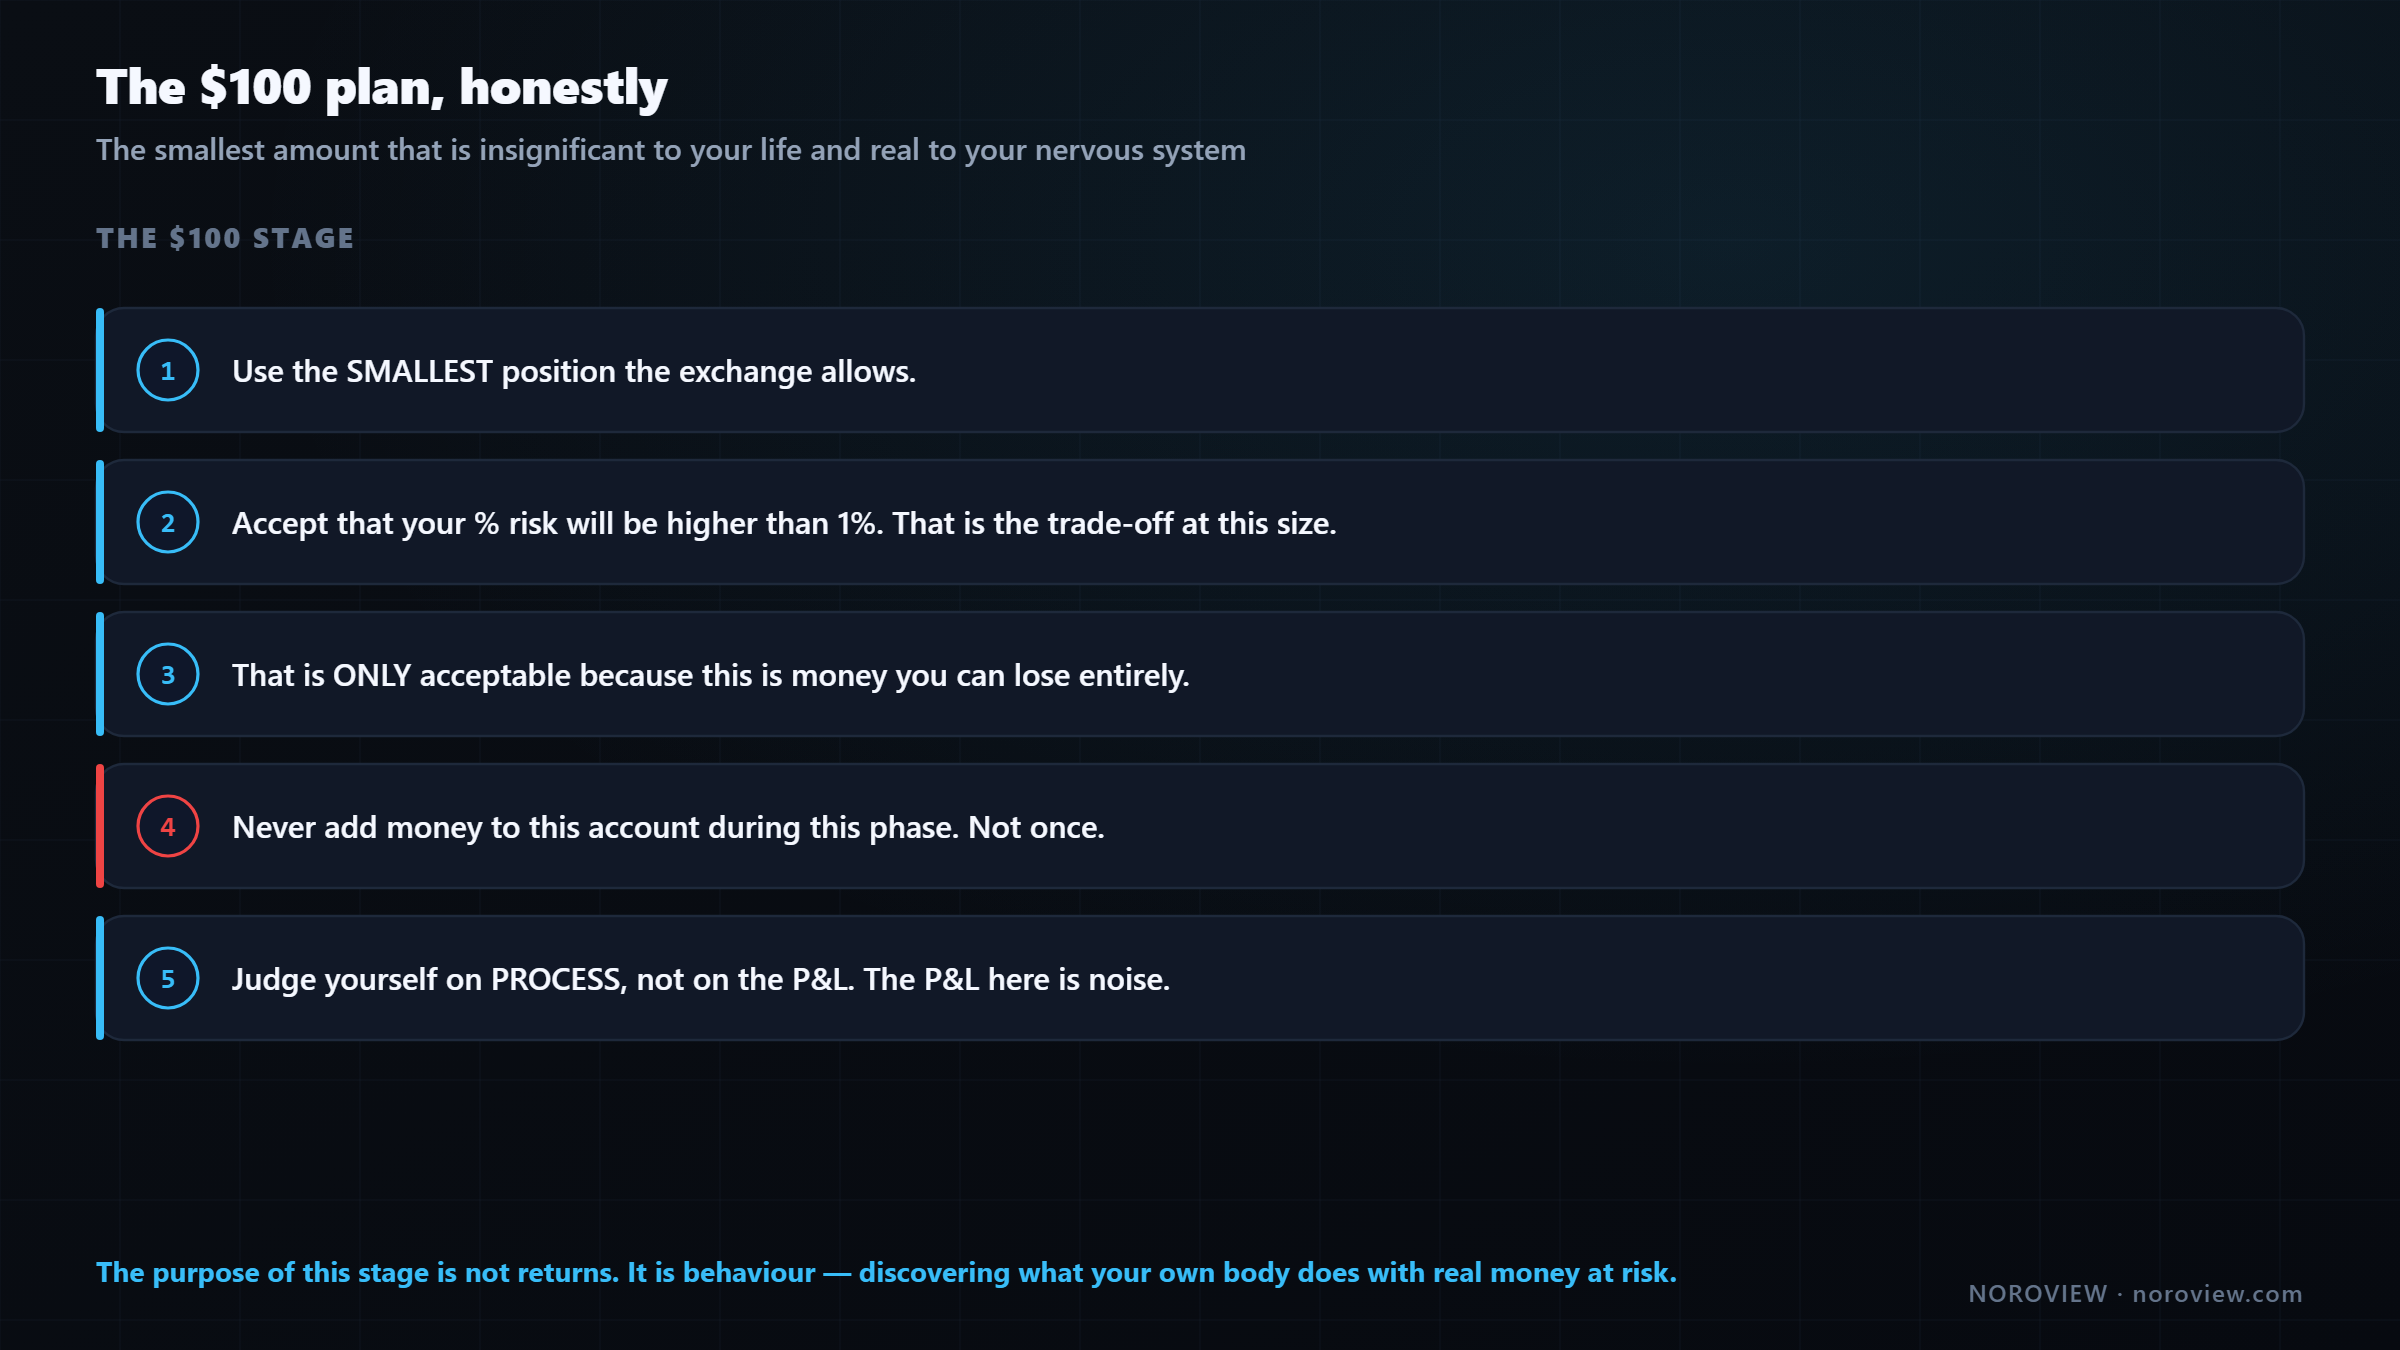
The purpose of this stage is not returns. It's behaviour.
$100 is the smallest amount that is simultaneously insignificant to your life and real to your nervous system. You have done twenty paper trades and followed your rules perfectly — because it was a simulator. Now put one real dollar of your own money at risk and something changes: your hands, your breathing, your willingness to sit through a drawdown. That gap is the thing you are here to discover, and there is no way to discover it without real money.
The awkward arithmetic
I would rather tell you than let you find out and think you did something wrong.
$100 account · 1% risk = $1 per trade

On BTC, a $50 stop distance → position ≈ $1,900 notional
→ that needs meaningful leverage on $100 of margin

And exchange minimum order sizes may be larger than your ideal position anyway.
One percent of $100 is one dollar, and a one-dollar risk with a realistic stop distance implies a position size that either needs uncomfortable leverage or is simply below the exchange's minimum order size.
So here is the honest answer, and it is not the neat one:
1 · Use the SMALLEST position the exchange allows.
2 · Accept that your % risk will be higher than 1%. That's the trade-off at this size.
3 · That is ONLY acceptable because this is money you can lose entirely.
4 · Never add money to this account during this phase. Not once.
5 · Judge yourself on PROCESS, not on the P&L. The P&L here is noise.
Rule 2 is unavoidable at this size, and pretending otherwise would be dishonest. It might be 3%, it might be 5%.
Rule 3 is what makes rule 2 acceptable. The whole hundred. If losing $100 would affect your life, do not do this stage yet — build savings first and come back. There is no shame in that, and it is the correct decision.
Rule 4 is the one that actually matters.
Never add money to this account during this phase. Not once.
Topping up converts a controlled experiment into an open-ended commitment, and it removes the single most valuable piece of information the phase produces: what you do when the account is down and you cannot fix it with more capital.
Rule 5: the P&L on a $100 account is statistically meaningless. Twenty trades at $1–5 risk tells you nothing about your edge and everything about your behaviour. Grade the decisions.
When to scale up
Do not scale on a feeling, and do not scale on a good week. The course's own rules already define the gate:
- A meaningful sample. Not twenty trades. A few hundred before results describe skill rather than luck.
- Process adherence, measured. Your journal should show that rule violations are rare and shrinking. If a few repeated violations still account for most of your losses, more capital just makes them more expensive.
- Limits respected under pressure. You hit the daily loss limit and stopped. You skipped a trade because a blocker was present. Those are the events that prove the system exists.
- Then, and only then, a written increment. Decide the step size in advance and make it small. Never increase in the middle of a hot streak.
And the benchmark from lesson 1 stands: one full year of profitable trading with controlled risk before you start talking about trading as a serious part of your income. Until then it is a skill you are building, not a job you have.
Common mistakes
- Funding an account before completing the security checklist.
- Using SMS two-factor when an authenticator app is available.
- Arriving at the exchange from a search result instead of a bookmark.
- Confusing leverage with risk — and then taking a position twenty times too large.
- Placing a protective stop as stop-limit and not getting filled in a crash.
- Market-ordering entries on a small account and paying taker fees on both sides.
- Placing a limit order at the exact analysis price when trading a different venue.
- Adding money to the $100 account the first time it is down.
Your homework
- Complete the security checklist in full before anything else. All seven items.
- Read your exchange's fee schedule and write down the maker and taker rates for your tier, then calculate the round-trip cost on your typical position size.
- Set up the two-screen workflow and paper-trade it for a week: analysis on one screen, order entry on the other, including the both-screens price check before every order.
- Only if all three lesson-15 conditions are true, fund the smallest amount you can genuinely lose entirely, and take five trades judged purely on process.
Take the twenty logged paper trades first →
Three things to remember
- The account is the asset. Security comes before strategy, and a bookmark beats a search result.
- Leverage is a margin tool, not a risk multiplier — but liquidation is real, and your stop must sit far closer than it.
- The $100 stage is about behaviour, not returns. Smallest position, no top-ups, graded on process.
← Previous: Risk Management and Psychology · Course index: Order Flow Trading Course · Next → Trade Management: Break-Even and Trailing Stops
Frequently asked questions
How do you day trade crypto with $100? Use the smallest position the exchange permits, accept that your percentage risk will exceed the usual 1% rule at that account size, never add money during the phase, and grade yourself on process rather than profit. The purpose of a $100 account is to learn how you behave with real money at risk, not to generate returns.
What is a funding rate? A funding rate is a periodic payment between long and short holders of a perpetual futures contract that keeps its price tethered to spot. Longs pay shorts when the contract trades above spot and vice versa. It is a real holding cost, and extreme readings indicate a heavily one-sided, crowded market.
Does leverage increase your risk? Not by itself. Two positions of identical size lose identical amounts whether opened at 1× or 10× — leverage only changes how much margin is tied up. What increases risk is using the available leverage to take a much larger position, and the fact that higher leverage places your liquidation price closer to your entry.
What is the difference between stop-market and stop-limit? A stop-market order becomes a market order when triggered, so you exit but at an uncertain price. A stop-limit becomes a limit order, so you control the price but may not be filled at all if price gaps past it. For protective stops, stop-market is safer because not exiting is far worse than a poor fill.
What are maker and taker fees? The maker fee applies when your resting limit order provides liquidity and somebody trades against it. The taker fee applies when your order removes liquidity by crossing the spread, and it is always higher. On small accounts, consistently entering with limit orders materially reduces fee drag.
Should beginners trade spot or perpetual futures? Spot, generally. It has no liquidation risk, no funding cost and no leverage, which removes an entire category of ways to lose while you are still learning to read the market. You can analyse the deeper perpetual futures order flow and execute on spot.
How do you secure a crypto exchange account? Use a unique password from a password manager, app-based two-factor authentication rather than SMS, recovery codes written on paper and stored offline, withdrawal address whitelisting where available, a dedicated email address, no API keys with withdrawal rights, and a bookmarked URL you always use.
Can you analyse on one exchange and trade on another? Yes, provided the venue you analyse is genuinely liquid, the two instruments are tightly arbitraged, you treat your levels as zones rather than exact prices, and you know whether you are comparing spot to perpetual futures. Never execute on a venue so thin that your own order moves it.
Sources
- Kraken Learn — perpetual futures
- CME Group Education — introduction to order types
- CISA — multi-factor authentication guidance
Soroosh Moghimi — six years inside financial markets: algorithmic trading, HFT, crypto and AI, after a decade building startups. He publishes this course free because he already paid for the lessons in it. There is no paid course and no signal group. @sorooshmoghimi · About
Start reading real order flow
You cannot learn this from a candlestick chart, and you do not need to spend a cent to begin. The standard footprint chart is free for every NOROVIEW user, market replay is free, and the paper-trading simulator is free.
Open NOROVIEW free → · Compare plans →
⚠️ DISCLAIMER — EDUCATIONAL CONTENT ONLY
This article is for educational and informational purposes only. It is not financial, investment, or trading advice, and nothing in it is a recommendation to buy, sell, or hold any asset. Trading cryptocurrencies and leveraged derivatives is high risk and can result in the loss of some or all of your capital. Only risk money you can afford to lose. Any levels, indicators, signals or results shown are illustrative and are not a promise or prediction of future performance. Charts may be shown on a demo or paper-trading account and do not represent real trades or returns. Always do your own research. You alone are responsible for your decisions.
Keep reading
Related posts

16. Trade Management: Break-Even, Partials and Trailing Stops
Trade management explained: when break-even stops cost you money, partial exits, four kinds of trailing stop, the order-flow exit, and diagnosing yourself with MFE and MAE.

14. Risk, Drawdown and the Mind: Day Trading's Real Edge
Day trading risk management and psychology: position sizing math, drawdown recovery arithmetic, hard limits, decision vs outcome, and the five states that break traders.
13. Fair Value Gaps, Confirmed With Order Flow
Most fair value gaps do nothing. Five order-flow checks that tell you in advance which FVGs are worth trading and which are decoration.
5. Market Structure and Trend: How to Pick Your Side Objectively
How to identify market structure objectively: higher highs and higher lows, swing point rules, impulse vs correction, and the arithmetic behind trading with the trend.
11. My Order Flow Entry Model, Step by Step
A complete order flow entry model: the four conditions, the exact trigger candle, the value-area filter, and the ten-item blocker list that vetoes a trade.

9. The Only Support and Resistance Levels I Actually Trade
Order flow support and resistance: how to find levels built from participants rather than price — high-ATS levels, automatic S&R and untested POCs.
Discussion (0)
Want to join the discussion? Comments live inside the platform.
Open NOROVIEW